I was SO excited about trying out the Born Pretty Store water decals! I chose two sets - the colourful fruity ones here (item 5625) and the black and silver ones here (item 5621) I was a bit concerned that these might be too complicated for me, and I have to say - I did mess up the first few I tried!
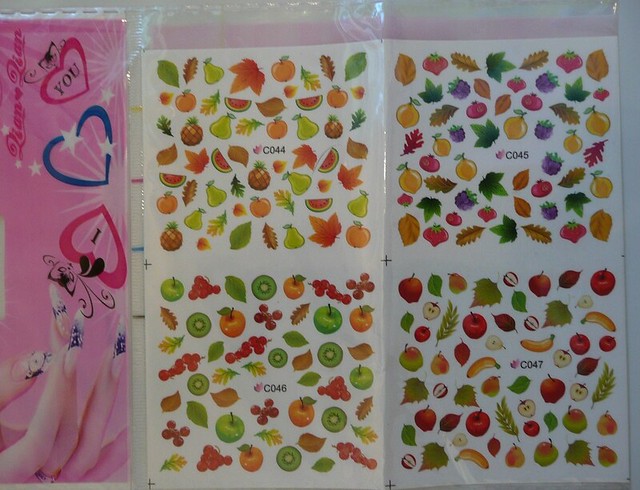
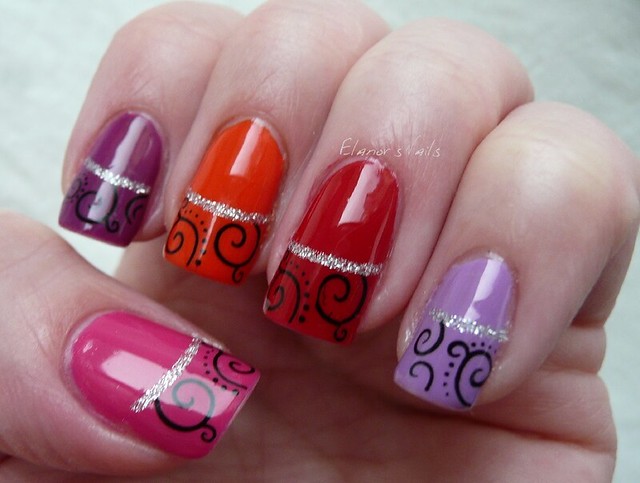 These ones are from the second set of decals. The reason this is on a skittle base is that I had planned to use the fruit to make a really colourful mani, with bananas on a red base, pineapples on a purple base, apples on a pink base, and so on. However, I just could not get the decals to be soft enough to bend to my nail shape, so I gave up on them for now and grabbed the other pack!
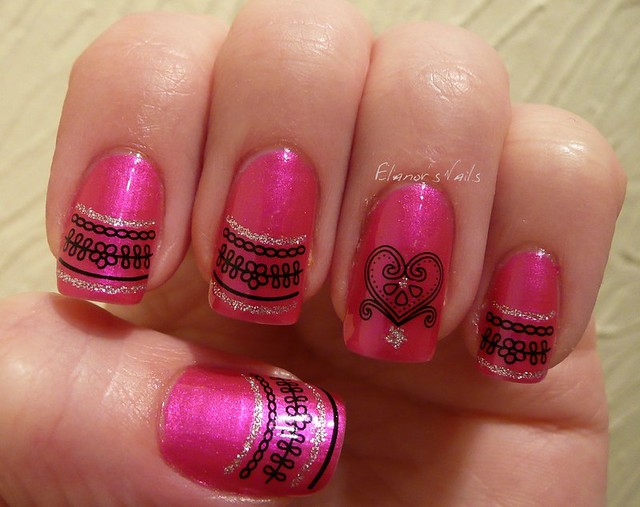
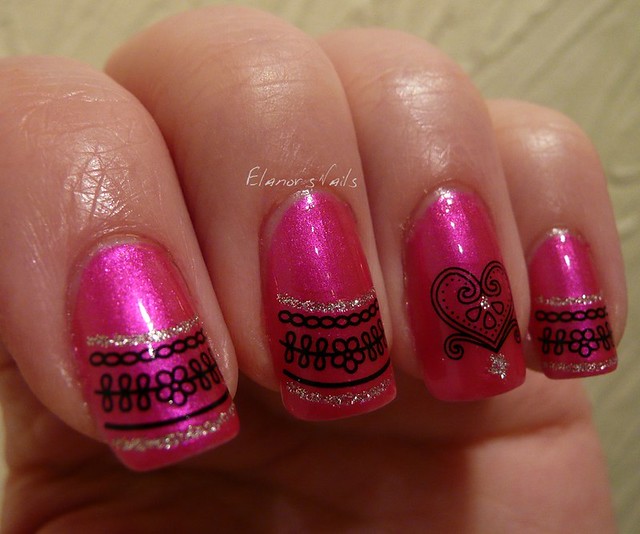
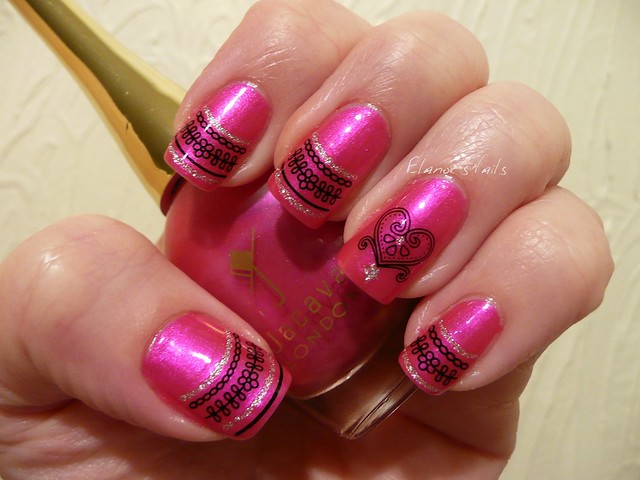
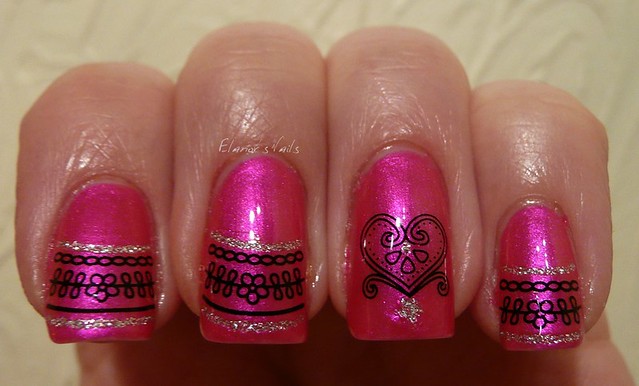
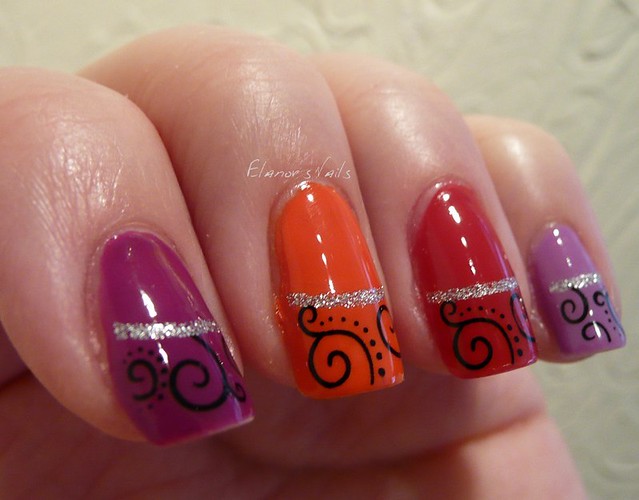
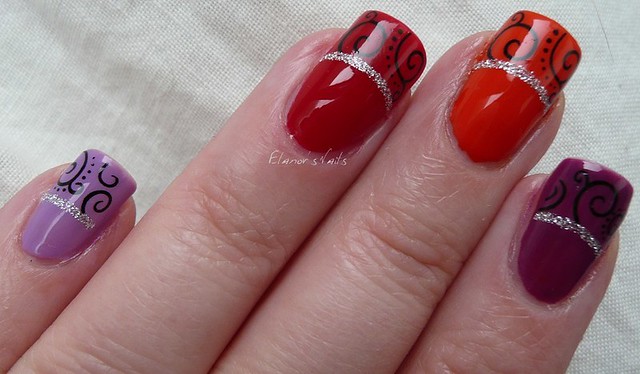
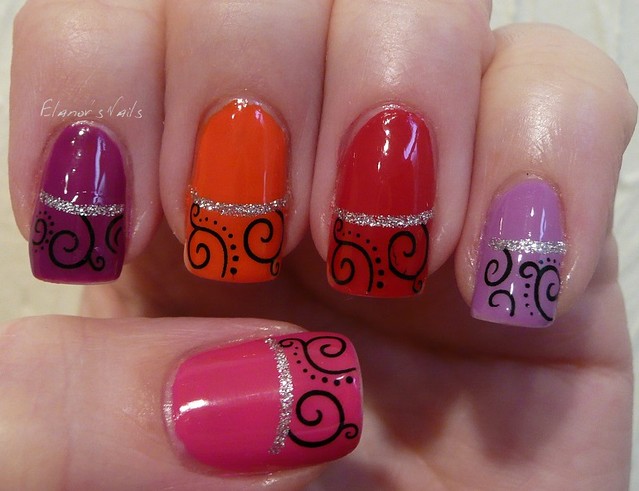 The colours here are Barry M Bright Purple and Shocking Pink, Rimmel Pro Heart on Fire, and Ultra Violet, and OPI Roll in the Hague.
 These took a little bit of practice to get the hang of, but basically, you paint your nails and allow them to dry, then cut out the decal you want to use (I used my tiny sewing scissors), peel off the plastic film, and drop the card+decal into a little bowl of water. I then used a combination of tweezers and my fingers to slide the decal off the card, and onto a wet nail. While the nail's still wet you can slide the decal into position, and I then dabbed the nail dry with a soft cloth. When they were all done, I added topcoat. Once I'd done a couple of nails and got used to the method, it was really easy, and pretty quick too.
 The decals come on a huge sheet with hundreds of separate stickers - look!
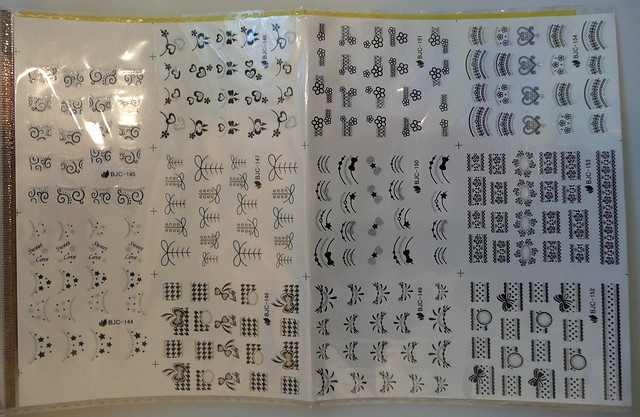 These are for sale on the Born Pretty Store website for $4.73! I think that's a complete BARGAIN considering how many there are here! There's enough for at least 11 full manis, although I think you'd easily get far more than that out of it.
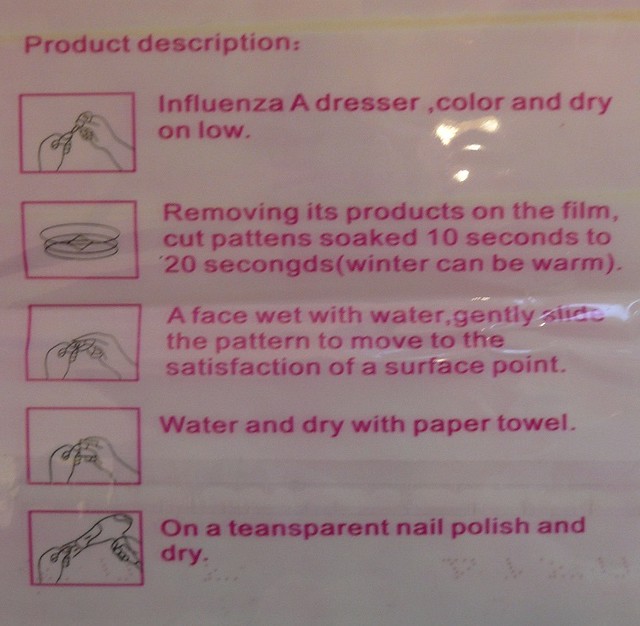
The instructions on these made me giggle a bit - I understand (mostly) what they meant to say, but still!
These are for sale on the Born Pretty Store website for $4.73! I think that's a complete BARGAIN considering how many there are here! There's enough for at least 11 full manis, although I think you'd easily get far more than that out of it.
The instructions on these made me giggle a bit - I understand (mostly) what they meant to say, but still!
 And
And
 And I've just realised why I couldn't get the fruity ones to work! I didn't use a hairdryer! I'm so relieved - I've only ever had success with BPS items before, and I was really surprised that I couldn't get these to work properly. I am so looking forward to doing some kind of autumnal leaf mani with these in a few months' time! These fruit/leaf decals are only $3.99!
 Overall - I love these! I think they look really effective, a bit like stamping, but without the mess or the chance of getting it wrong, and far more detailed and clean than I could possibly do freehand. And because you put them over your own base, you can really play around with them and make all sorts of different looks. I'm going to have a lot of fun playing with these over the summer!
If you fancy trying these - or one of the many MANY other designs that BPS stock - then don't forget that you can still use my discount code to get 10% off your order, and that Born Pretty Store also have worldwide free shipping.
I received these products for review purposes, but words and opinions are entirely my own. I do not receive anything if you use my discount code, although when it's been used ten times, BPS will let me host a giveaway for my readers! See my Disclosure page for more details.
Overall - I love these! I think they look really effective, a bit like stamping, but without the mess or the chance of getting it wrong, and far more detailed and clean than I could possibly do freehand. And because you put them over your own base, you can really play around with them and make all sorts of different looks. I'm going to have a lot of fun playing with these over the summer!
If you fancy trying these - or one of the many MANY other designs that BPS stock - then don't forget that you can still use my discount code to get 10% off your order, and that Born Pretty Store also have worldwide free shipping.
I received these products for review purposes, but words and opinions are entirely my own. I do not receive anything if you use my discount code, although when it's been used ten times, BPS will let me host a giveaway for my readers! See my Disclosure page for more details.
This is a bit of an odd one! I was in my local small independent beauty shop the other day, which sells China Glaze, and the lady was putting out a 'new' China Glaze display. She was using the card stand from the Hologlam display, but I could see that they were bright neons, so I assumed they were the new summer collection. I started looking, and we chatted a bit, and she said they were the new collection, and weren't they gorgeous? I agreed, and chose this one, Turned Up Turquoise, as it was a shade I really don't have at all in my collection.
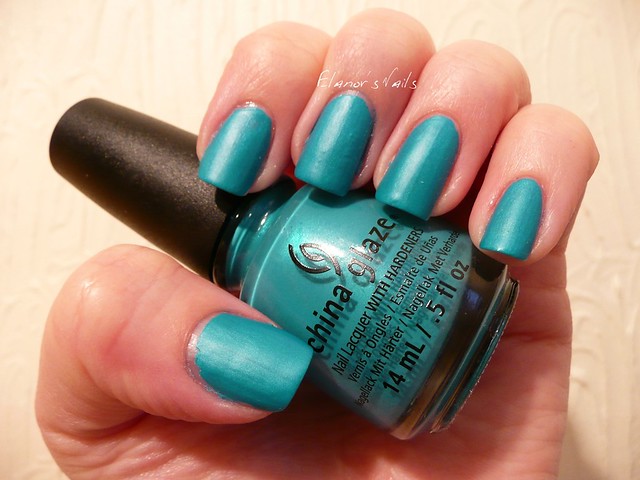 This is two coats of Turned Up Turquoise, no topcoat. I was a bit surprised to find this dried matte. It also had a really tricky application - it dries ridiculously quickly, which means you have to work fast if you don't want lumpy bits. It also stains A LOT. Because I didn't recognise that as one of the 2013 collection, I googled, and apparently this is from the 2008 WOW Factor collection! It must have sneaked on to the display by accident!
 Anyway, I am not convinced. I like the colour - super bright neon bluey-green (although it's impossible to capture on camera!) - but the application was so awkward that I don't know if it was worth it.
 I also found the clean-up really tricky - as you can probably see, it was almost impossible to clean off my cuticles neatly. So overall, not a huge hit with me!
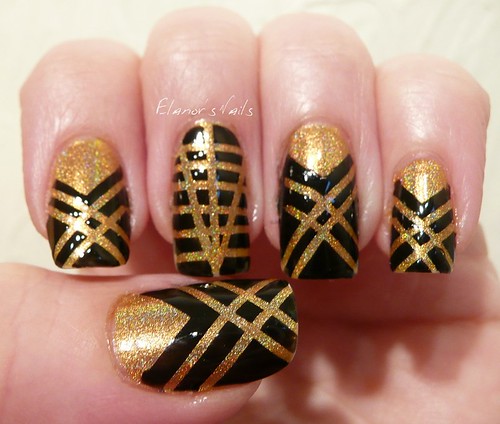
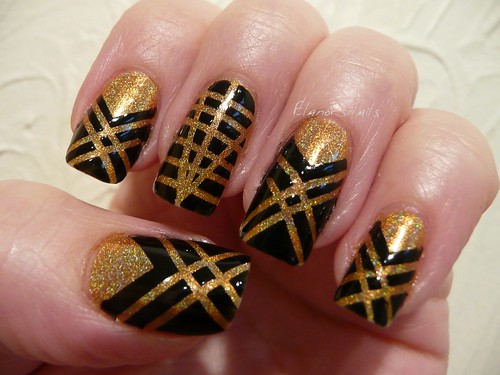
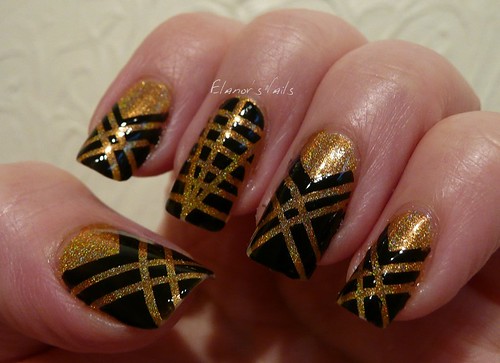
Following on from my earlier post with the awful nail wraps fail, I thought I'd see whether I could achieve the same intended effect of the wraps, only with polish. So I used Barry M Lychee as my base (2 coats) and stuck on some silver glequins using Seche Vite topcoat. This is the result.
 I think this looks far better than the wraps - the bling is sparklier and shinier, and is easier (far easier!) to apply. OK, the glequins aren't quite as neatly and regularly arranged as the diamantes were on the wraps, but I think the increased sparkliness makes up for that.
 The glequins by the way, are the ones I bought from the Born Pretty Store last year. I got loads of little pots of different colours.
When the lovely people at Elegant Touch asked me if I'd like to review some of their new nail wraps, I was quite excited, as I've seen these in shops (they're stocked in Superdrug and Boots) and had been very tempted, but wasn't sure I'd be able to get them to work, as I've had zero success with fake nails (they never fit my nails). I wasn't expecting them to send me THREE sets!
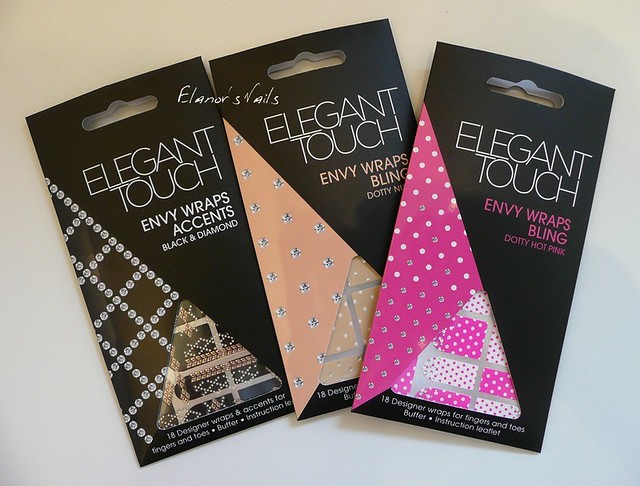 Look! Aren't they pretty?! These are 3 sets of the 'bling' nail wraps, which are on sale for between £5 and £7 per pack in Superdrug, although they're sometimes on special offer if you're lucky. Of these three, the Dotty Nude ones were the least appealing to me (they're pretty, but nowhere near as pretty as the other two) so I thought I'd try those first, in case I made a complete hash of it, as I didn't want to ruin the other two packs. And I'm glad I did!
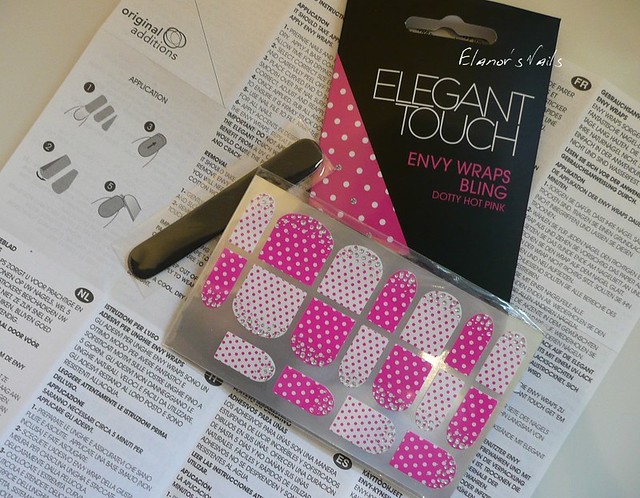 Each pack comes with 18 wraps (a peculiar number!), an emery board, and full instructions. The Dotty Nude set had some wraps with diamante pieces and some with pearly white pieces. I had originally intended to do alternate nails with diamante and pearls, but the sizes didn't work like that. I found it really difficult to get sizes to fit my nails. There were quite a lot of wraps (6 I think!) that only fitted my little nails and were too narrow for all the others, which meant that there weren't enough other sizes to do all my nails. There were some very wide wraps which I cut down to fit my thumb and ring fingers, although that was awkward and fiddly, so in the end I didn't bother with my right hand. The actual application was super easy on the nails that did fit - my little and index fingers. It's just a case of carefully placing the wrap, smoothing it down, and filing off the extra at the tip. I thought my little and index fingers looked great, until I saw the macro shots!
 The wraps themselves are fine and soft, easily pliable and easy to remove at the start if you've slightly mis-positioned it on your nail. However, I found that on my ring finger, the wrap just couldn't handle the curve of my nail, and I ended up with that ugly crease at the tip. There's also a notch on the tip of my middle finger where a diamante piece just happened to be on the very edge of the nail. I also found it impossible to cut the wraps neatly down to size to fit my nails, without making a mess of the sides. I was so disappointed with how these looked in the end! It's probably my fault - my nails are an odd size, or my skills are just lacking... There are tiny creases everywhere, which didn't show up much in real life, but which bothered me. In the end, these didn't stay on longer than an hour, and I wouldn't have worn them out because I didn't have enough wraps to do my right hand to match anyway.
I'm gutted! I am pretty sure that many people will love these - the designs are so pretty, and the quality seems really good. I just don't have the nails or the skills to put them on properly. I can't decide whether to try again with the pink ones, or whether to put them in a giveaway for my readers...
These products were provided for my honest review. Please see my Disclosure tab for more information.
The wraps themselves are fine and soft, easily pliable and easy to remove at the start if you've slightly mis-positioned it on your nail. However, I found that on my ring finger, the wrap just couldn't handle the curve of my nail, and I ended up with that ugly crease at the tip. There's also a notch on the tip of my middle finger where a diamante piece just happened to be on the very edge of the nail. I also found it impossible to cut the wraps neatly down to size to fit my nails, without making a mess of the sides. I was so disappointed with how these looked in the end! It's probably my fault - my nails are an odd size, or my skills are just lacking... There are tiny creases everywhere, which didn't show up much in real life, but which bothered me. In the end, these didn't stay on longer than an hour, and I wouldn't have worn them out because I didn't have enough wraps to do my right hand to match anyway.
I'm gutted! I am pretty sure that many people will love these - the designs are so pretty, and the quality seems really good. I just don't have the nails or the skills to put them on properly. I can't decide whether to try again with the pink ones, or whether to put them in a giveaway for my readers...
These products were provided for my honest review. Please see my Disclosure tab for more information.
I was looking at my collection and trying to decide what to wear, and thought I hadn't worn my Models Own Mirrorball glitters in ages! So I decided to go for it. Last time, I wore them over their corresponding colours, but today I decided to wear them over white.
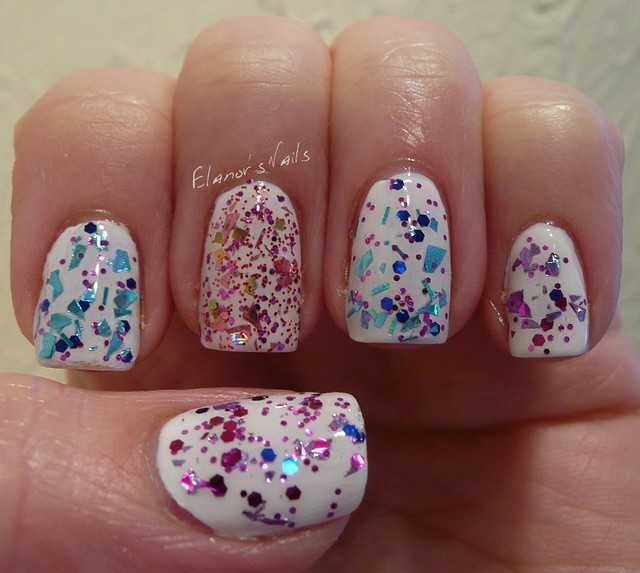
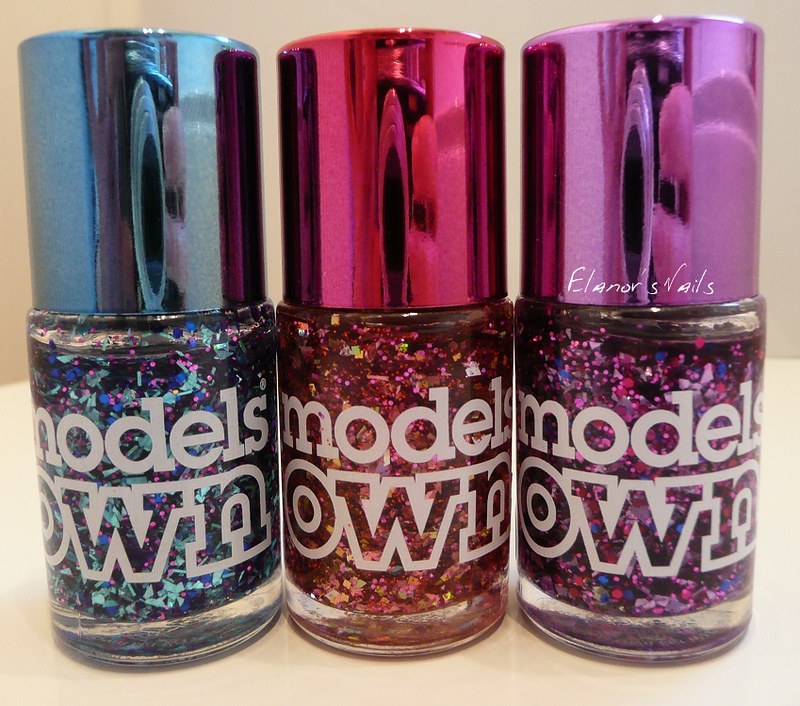 I used two coats of Essie Blanc, and then added the Models Own glitters as a skittle. I've used Boogie Nights (the purple one) on my thumb and little finger, Freak Out (the blue one) on my index and ring fingers, and Hot Stuff (the pink one) on my middle finger. And I remembered why I haven't worn these since I swatched them last time - they STINK! The smell is awful. So, so bad.
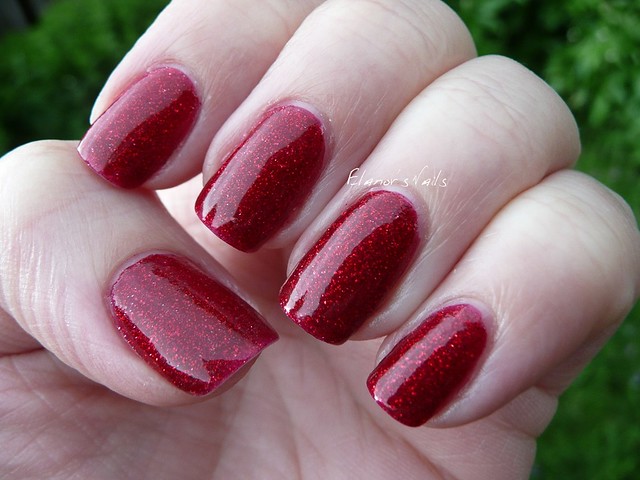
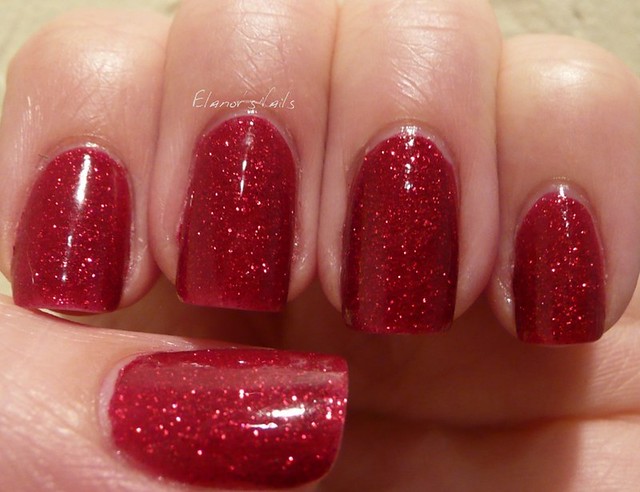
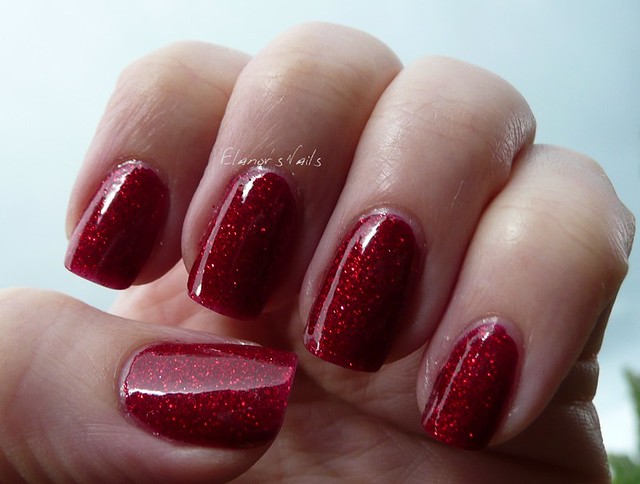
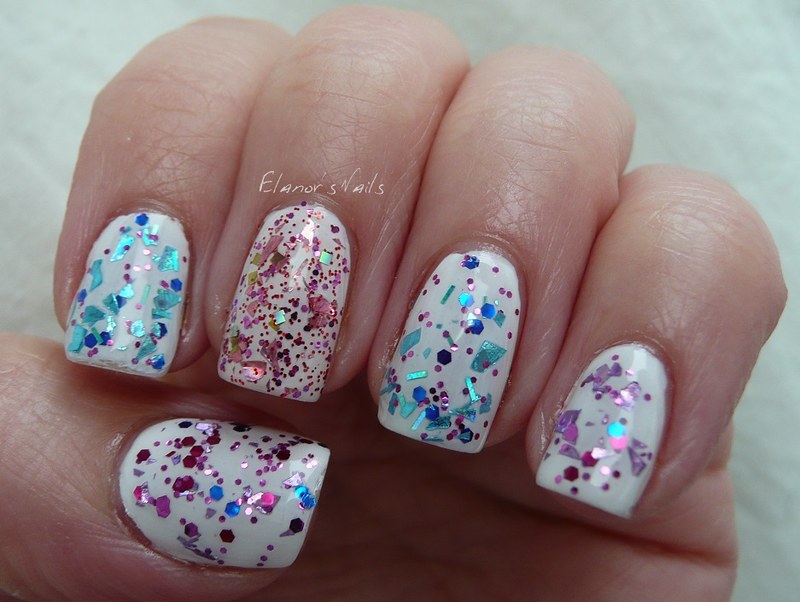 Anyway, the glitters are pretty. This isn't really two coats of the Mirrorballs, as it's not that kind of polish. It's more like two sets of dabbings of the Mirrorballs, pushing the glitter around a bit to get it more or less even. As you can see, they are mega sparkly, and full of different shapes and colours of glitter and mylar flakes. They look great, I think! However, they smell bad and they take ages to dry, so I'm not hugely impressed. I do like how they look over white though.
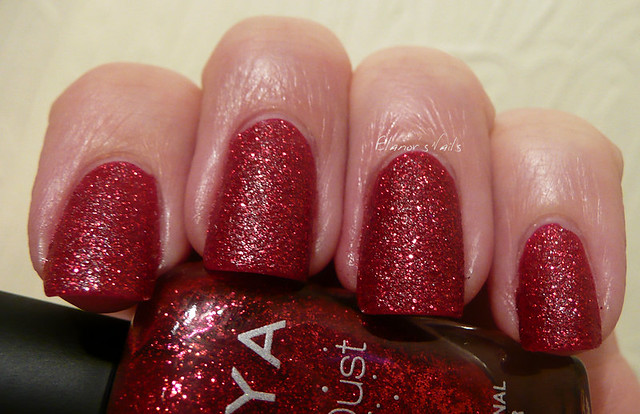
 The pink one is the densest in coverage, as it has more of the tiny glitter. The blue and purple ones have a bit more variety in colour too - Boogie Nights has pinks and purples, and a few blue pieces, Freak Out has turquoises and blues, plus some magenta micro glitter. They're pretty, but I'm not sure the smell and awkward application is worth it.
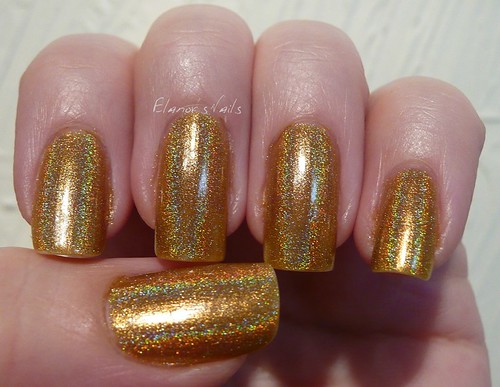
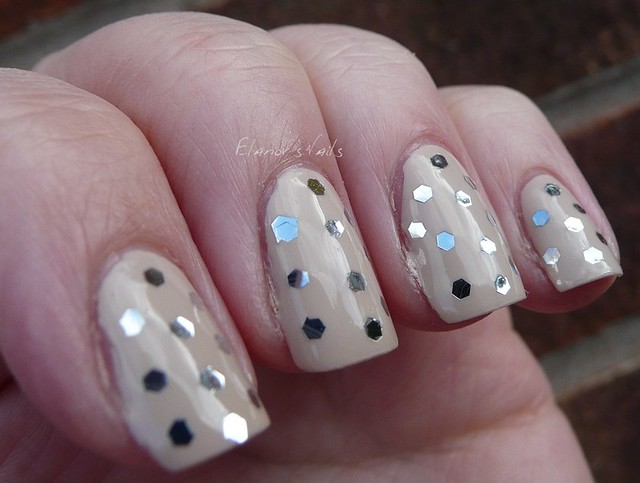
I wanted to jazz up yesterday's plain nails a bit, but didn't have much time, so I added a quick swipe of China Glaze Solar Flare, one of my favourite glitters ever!
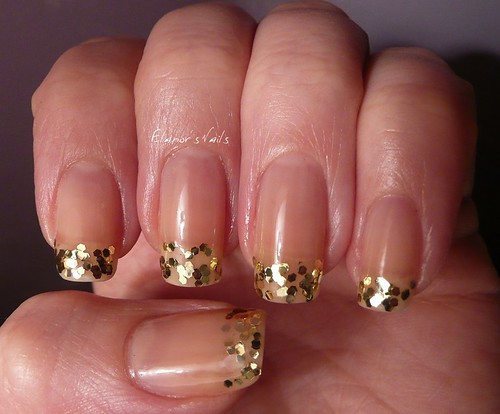 Solar Flare is a clear base with large gold hexagonal glitter pieces. In these macro shots it looks a bit patchy, but in real life it's just a blingy, sparkly tip to the nails, which got lots of compliments at work today.
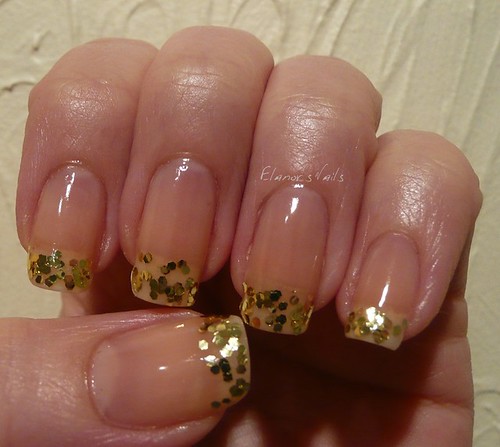 This was over yesterday's Barry M Nude (2 coats).
Just a quick post today - this is Barry M's Nude. This is two coats, no topcoat.
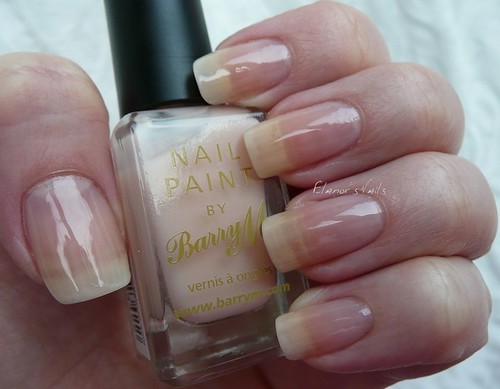 Nude is a very sheer, pinky nude. Unlike some sheer polishes, it isn't at all streaky. Whilst this is sheer, and looks nude, it is covering a multitude of blotchy, uneven colours and odd shapes in my nails, making them look quite even, I think.
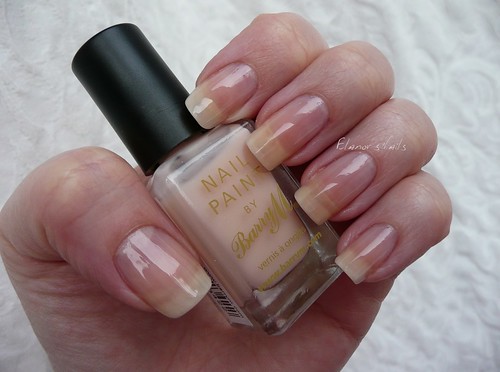 My nails are getting really long! I'm sure I'll break one any day now, haha! They're starting to get just that bit too long, so they're getting in the way. I'll have to file them down a bit very soon I think.
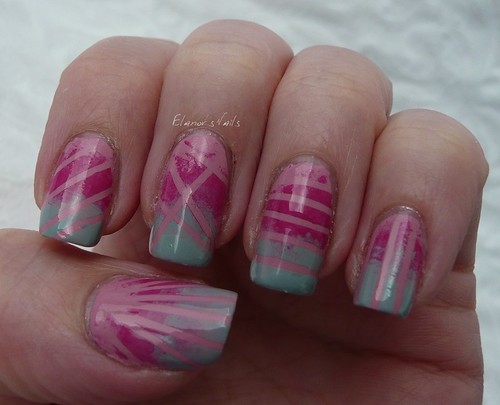
Today I painted my nails with China Glaze Pink-ie Promise, but when I added topcoat, my Seche Vite had tiny flecks of something black in it, and spoilt the look, so I decided to cover up most of the pink with something else. I used striping tape to make random patterns on my nails, then sponged Barry M Shocking Pink and Essie Maximillian Strasse Her over the top.
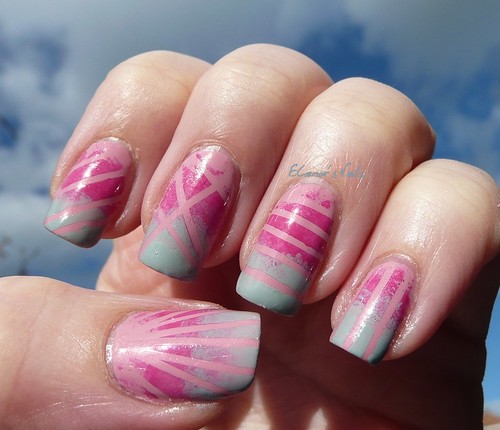 This came out far less tidy than I'd hoped, but then I suppose that's what I get for not taking enough time over the gradient. I wish it had been neater. Still, I like the effect, and it does look pretty cool! I do love the grey-pink combo too, it's so almost entirely 80s that I feel about 13 again!
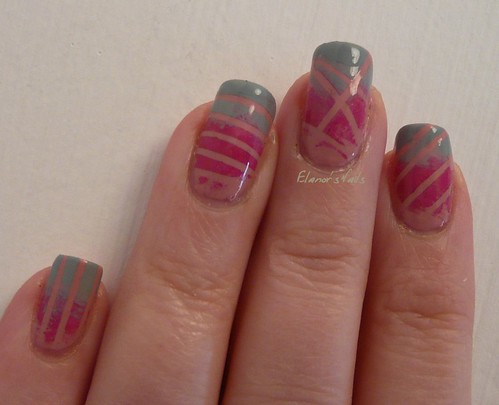 Of the patterns, I think I like the random one on my middle finger the most. Next time I think I'd prefer to do all my nails with the same pattern.
 What do you think?
I'm back! It's been TWO WEEKS since I was able to get online at home, and I'm so excited to be back - isn't that ridiculous? I bought a new laptop (my old one died of coffee/milk/sugar poisoning, caused by cat) - and by the way I am NOT a fan of Widows 8! - but still couldn't get online for another week because my ISP had to send me a new router, as the old one wasn't compatible with Widows 8! So anyway, here I am, and normal service will be resumed asap.
I still can't edit photos properly - I've downloaded Gimp and Picasa, but I'm not convinced by either yet. I obviously need to spend a lot of time working on them - I can't get used to how complicated Gimp is! (Can anyone advise easily how you can save a pic there as a JPEG?) and Picasa isn't as useful as my old Photoshop Elements was (also not compatible with this computer!) So I apologise for the photos here.
While I was offline, here are some of the nails I wore:
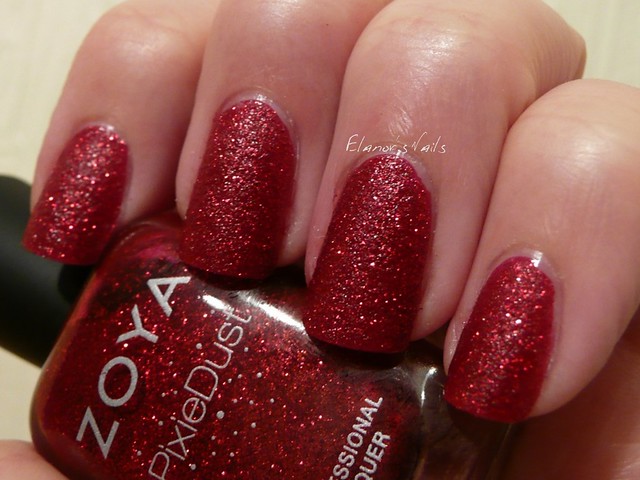
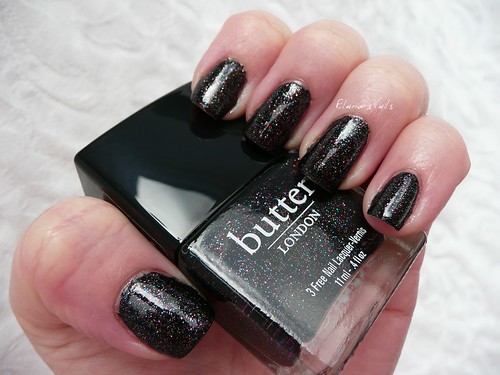
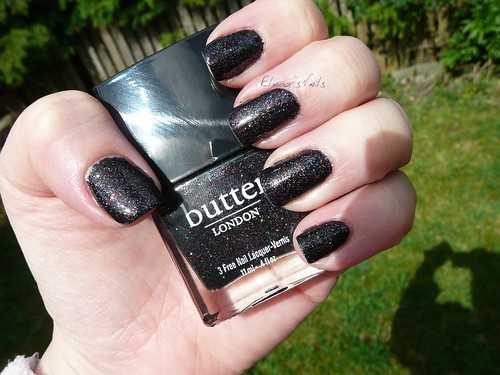
Butter London The Black Knight. This is two coats over a coat of Rimmel Black Out.
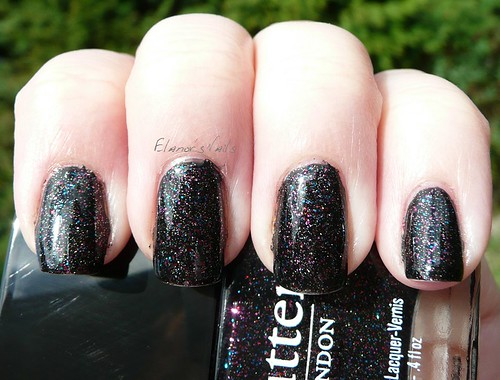 I have to say, I was a bit disappointed with The Black Knight. It wasn't as sparkly or as amazing as I hoped it would be. Application was nice, it was smooth and dried fine (although the finish was gritty, it does need topcoat) but it just wasn't as awesome as I thought it should be.
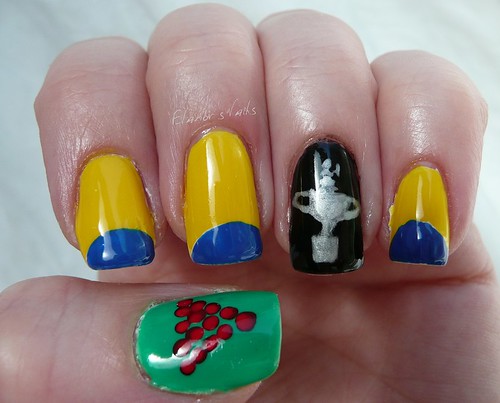
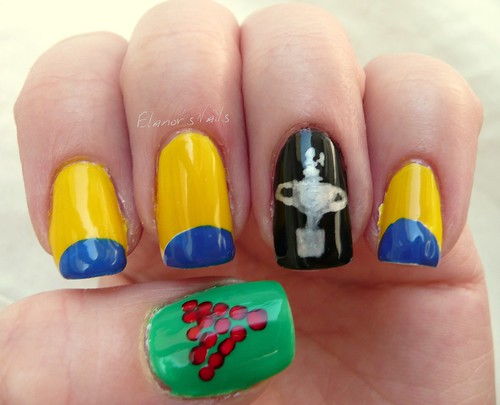
 I also did more snooker nails - the yellow and blue is the setting of the snooker World Champs this year (they had a blue carpet and a yellow side wall, with arches cut out at the bottom), the thumb is obviously the triangle of reds, and the accent nail is my attempt at the World Championship trophy using a Barry M Silver nail art pen. The other colours are Barry M - Cobalt Blue, Yellow, Spring Green and Red.
So my old laptop is dead, deceased, an ex laptop. I have now bought a shiny new one, but for one reason and another I still can't blog yet. I have no photo editing software (my Photoshop Elements on my old laptop isn't transferrable apparently) and I'm not online (my very old modem isn't compatible with shiny new USB3 ports, and anyway the details of my internet connection are stored safely in my old (dead) laptop and can't be retrieved. I need to contact my ISP, but they're not proving easy to work with!
So in the meantime, I am painting my nails and taking photos, but I can't edit them or upload them or get them on my blog. I'm sitting in a coffee shop now, using free WiFi and googling for free downloadable photo editing software that isn't impossible to understand and/or useless. If I can at least find a way of editing photos then I could potentially blog this way for a bit, until I get my home internet connection sorted out...
So all in all - aargh! If you know of a decent photo editing programme that I can get online please let me know! I can read your comments on my phone so long as I'm careful (I am approaching my mobile data useage limit, lol?)
In the meantime... byeeee! *waves*