Today's nails are some autumnal dots, using several different polishes.
I started with a base of two coats of Barry M Butterscotch Sundae. I then used dotting tools to add curved rows of dots using Barry M Cocoa, Chilli, Mustard and Twinkle Twinkle, and OPI DS Luxurious.
I topcoated over everything for extra shine and longevity. I wore these to work for a couple of days, and really liked how they looked.
These nails were inspired by these gorgeous dotted Easter eggs by Lucy's Stash - aren't they beautiful? My nails are a very pale second in comparison!
I started with a base of Barry M Cream Soda. I then painted the half moons using a fine paintbrush, and used a dotting tool to make the patterns.
I used a whole batch of Barry M Gelly colours to do these: Sugar Apple, Acai Smoothie, Dragon, Sugar Plum, Pink Punch, Guava and Blue Grape.
I wasn't ready to take off yesterday's pretty pink, Barry M's Acai Smoothie, so I added a band of dots across the middle for a simple spotty look.]
The dots are also Barry M Gellys - I used Dragon Fruit, Sugar Plum, Pink Punch and Rose Hip.
I think this works quite well. What do you think?
I'm sorry, I've been missing in action and haven't posted for a couple of weeks now. It's been our busiest time at work, and I've had zero spare time or energy for doing stuff to my nails! Things are starting to ease off now though, and I'm hoping to get back to more regular posting.
You don't need to buy lots of fancy nail art tools or expensive polishes or complicated things to make nail art! If you're a nail blogger, or a nail blog addict, you'll already know about these tricks, but my NORMAL friends and colleagues are always asking how I do some of the things I do on my nails, so here's a post for them! It's not magic, or something super complicated. It's usually something cheap and easy. Here are my top tips for nail art using stuff you probably already have at home.
These are my essential items - I always have these at home, and use most of them almost daily on my nails. Sellotape. Baking foil. Cocktail sticks. Makeup sponges. Cotton buds.
So, what do I use all these things for?
Let's start with makeup sponges. I buy these in the pound shop - this whole bag cost £1. Using these, plus some foil and tape, you can make a gradient nail art look, which looks far more difficult than it is. This is one of the things that my colleagues most often seem impressed by.
Start by dabbing the sponge on some tape on all sides - this removes any fluff or loose bits of sponge. This is especially important with cheap sponges, as they can be a bit rougher in quality than the more expensive ones.
Next step is to paint your nails with your base colour. Here, I've used Models Own Coconut Cream, which is a pretty off-white creme. Then, I lay down some foil on my work surface, and paint two stripes of my chosen colours next to each other on the foil. I'm using Models Own Coconut Cream and Bubblegum.
Then use your sponge to press down on the two colours (or three, if you're feeling fancy!) - I use the wedge shaped end of the sponge, but any surface works.
You then just dab this onto your nail. The amount of pressure used is something you need to get used to. Too light, and the colours won't transfer. Too firm, and you could make a mess and make the surface lumpy. To really blend the colours, move the sponge slightly in a wiggling motion up and down the nail. This is just a very slight movement though! Do this on all the nails, and repeat with an extra layer if necessary to make the colours more intense.
You'll end up with something like this! As you can see, there's a lot of mess round the sides of the nails, but we'll deal with that later. There's also some textured bobbly bits showing on my middle finger nail here, and that's my fault for not cleaning the sponge on the tape enough. They are tiny bobbles of sponge. When the polish was dry, most of it just brushed off.
This is where the cotton buds come in! Dipped in acetone or nail varnish remover, they're my essential for cleaning up the mess round my finger tips after a gradient.
Add topcoat, and ta da! One gradient mani. Depending on the colour combination you use, you could have something subtle and pretty, or dramatic and wild. You could do a three-colour gradient, or a different gradient on each nail, or a vertical gradient along the length of the nail... the options are as open as your imagination!
I've already shown you the sellotape used here for prepping the sponge for a gradient. That's just the start though, and my most common use for tape is for blocking off parts of the nail for a tape mani. I used China Glaze Shooting Stars over my gradient to make a pretty triangle design.
First off, I cut short strips of tape, and stick them to the back of my hand. This is to slightly soften the stickiness, so that it doesn't rip the polish off the nail! You also need to make sure your base polish is totally dry and firm. This is where a quickdry topcoat is helpful!
I then position the tape over the nail, and make sure it's lying flat on the nail, with no lifted edges or bubbles. Here, I've used two strips to tape off a triangle shape. I then paint the contrasting colour (in this case, my sparkly glitter) over the tape, and quickly remove the tape before the polish dries.
Again, you're only limited by imagination: you could do stripes, or block off the tip, or the base of the nail. Or you could tape off one side of the nail to make a 50:50 colour split. I did this triangle design, alternating with the opposite pattern of cutting a triangle of tape so that the middle section of the nail was blocked off.
Here's my final design!
And here's another tape mani. This one uses three new Jacava polishes - keep an eye out on the blog, full reviews are coming soon! To do this, I painted my base colour (the blue), taped off half the nail diagonally and painted the second colour (the pinky one), and then taped off the nail diagonally in the other direction before painting the third colour.
On to the cocktail sticks! I use these for all sorts of things - they're great for clearing cuticles of any flooded polish when it's still wet. They're really useful for helping to peel off tape from the nail, or to add rhinestones or studs (using the point of a cocktail stick dipped in topcoat). But three nail art techniques that can be done with a cocktail stick are dots, dragmarbles (also called drymarbles) and spun sugar manis.
Dotting is one of the easiest things you can do with a cocktail stick. Yes, you can buy fancy metal dotting tools of various sizes, but you don't need them to make dotty nail art. Just dip the cocktail stick tip in polish and dot it on your base. Depending how much you dip, you can make teeny tiny dots, or bigger ones, or even shaped ones.
Next, drag marbling.
Dry marbles, or drag marbles are something I've only recently started trying out. You need to check out Sveta Sanders, she's the expert at these! Basically, you paint a thick layer of one colour, then quickly dab on dots of another colour, and while they're still wet, use the cocktail stick to swirl and drag to make a marbled design. This can be messy or neat, complicated or simple. Or just messy, like mine!
This is what it's meant to look like!
Lastly, a spun sugar mani involves using the stick to draw out long strings of drying polish which you then trail over a base colour, just like spun sugar that is used to decorate desserts.
To do this, drop a few dots of polish on some foil, and leave it to start thickening up and drying a bit. Then use the cocktail stick to draw the polish back and forth over your nail. This works best when the strings are thin, like spun sugar. I'm still working on this, so some of my strings are a bit thick!
This process leaves a real mess on the sides of the fingers, but acetone and a cotton bud easily solves that!
Here are a couple of manis I did using a combination of the techniques. I'm less than happy with the finished look, but I like some individual nails more than others.
I'm fairly pleased with how the dots came out here, and I like the gold spun sugar nail. I'm not happy with the drag marble at all though, as it just looks like a thick mess. Oh well, it's a learning curve!
This second mani was done with my new Jacava polishes again. This time, the drag marble is a bit better, but I'm not sure if it's too subtle to see properly. The spun sugar looked better before I added topcoat, which has flattened it out a bit.
Lastly, foil glitter polish removal! Some polish, especially glitters, can be a real devil to remove. I'm sure we've all experienced having to scrub away at rough glitter on the nails, which shreds the cotton wool and is really hard work. But the foil removal method makes it super easy.
First, cut some strips of foil.
Then add a bit of cotton wool soaked in acetone or polish remover on the nail.
Then wrap the nail tightly in foil.
Do this on all nails.Wow, this photo makes my freaky bent thumb look really obvious!
After a few minutes, just slide off the foil and cotton wool, and the polish just wipes off! I love this method, and use it really often.
So there we go. That's my tips for some easy nail art using stuff that you almost certainly have at home already. Who says you need fancy tools and equipment to have fancy nails?
I saw some gorgeous neon nails the other day that were a white background with lots of different neon looks on each nail. I can't find it now though! If anyone knows what it was I saw then please let me know so that I can see how mine compared and credit the inspiration!
Anyway, I started with a white base (Barry M Cotton) and then used dotting tools, striping tape and a fine brush to add various patterns. The colours I used were Models Own Sun Hat, Bikini and Shades, Barry M Superdrug Limited Edition 2013 and Cyan Blue, and Essence Flashy Pumpkin.
I know these aren't perfectly executed, but I am happy with how they turned out. They're bright and colourful (brighter than these photos, which look a bit washed out) and cheered me up during a busy day at work.
And just to prove that I do do both hands every time, here's my right hand!
I know it's less neat, especially with regards to the clean up (and don't look at my scabby cut on my thumb cuticle!) but it isn't significantly different from my other hand, so I'm quite pleased. I was a bit surprised to see a nail blogger on YouTube the other day (NOT the same blogger who did the neon nails I liked) who had gorgeously decorated long nails on one hand, but short, bare nails on the other hand! I understand that sometimes someone will only swatch colours on one hand because it's coming straight off again, but I do nail art because I want to wear it, so I always do both hands!
I liked my rainbow dots (see here!) so much that I did more dots for today's nails.
This is a base of Barry M Truffle. I then dotted across the middle section of the nails using Models Own Sunhat, Shades, and Diamond Luxe Radiant Pink, and Barry M Rose Hip. I added topcoat once everything was dry.
I love the contrast of the bright, zingy pinks with the neutral base.
I'm addicted to dots at the moment!
I'm always fascinated by brightly coloured rainbow nail designs when I see them on other blogs, and yet am always a bit disappointed when I do them myself, as I always end up with a bit of a mess. Today's nails were inspired by this lovely design by Nails by Jema. Hers are gorgeous, aren't they?
So, here are mine.
I started with a base of Barry M Pearl, the off-white one from the Silks range. I then dotted away with a whole host of other Barry Ms, mostly Gelly colours.
I'm not particularly happy with the way each colour blends into the next (i.e. they don't!) but I do really like the ring finger because the colour change seems a bit more natural.
I think the main difference between the original design by Jema, and mine, is that she has a lot more colour coverage on the nails - I was perhaps too cautious and left too much white showing. Plus I needed a better blend of colours too, so that it's not a sudden switch from one colour to the next.
I did get a bit bogged down in the idea that the colours needed to be in proper rainbow order, but maybe I should have given up on that and just done a more gradient-like blend.
Having said all that, I'm comparing mine to the original, which is a bit negative, I know. So without the comparison, I really like these nails, so much so that I've done them on my right hand and will wear them to work tomorrow.
 Week 3 of the British Nail Bloggers Colour Me Crazy! challenge is YELLOW. I was dreading this one a bit, because, you know... YELLOW! It's not a colour I wear often (or at all) because it's so... yellow. I have precisely two yellow polishes, and I've used them both here.
As it turns out, I don't actually hate this look! I used a base of Models Own Coconut Cream for a nice off-white base. I then added a medley of yellow designs using Barry M Yellow and Models Own Bikini.
On the little finger, I made dots using a fine dotting tool and Bikini. On the ring finger I freehanded some roses with both polishes and a fine nail art brush.
On the middle finger I used striping tape and both polishes to make a striped design. On the index I have a gradient of Coconut Cream and Bikini. On the thumb I was going to add a regular pattern of these yellow glequins, but they were so stuck together that I ended up just slapping on more so they all overlapped. I think in the end it was quite effective!
Today I wanted to do a mish-mash skittle look with red and white polishes. I started with Jacava Toffee Apple, and Essie Blanc on my ring finger. I then added some stamping using MoYou London Pro XL plate 01 and Konad white. I also freehanded some roses on my ring finger using Jacava Toffee Apple and Jacava Crimson Crush, with some Barry M Spring Green. I did the dots on my index finger with a Barry M nail art pen.
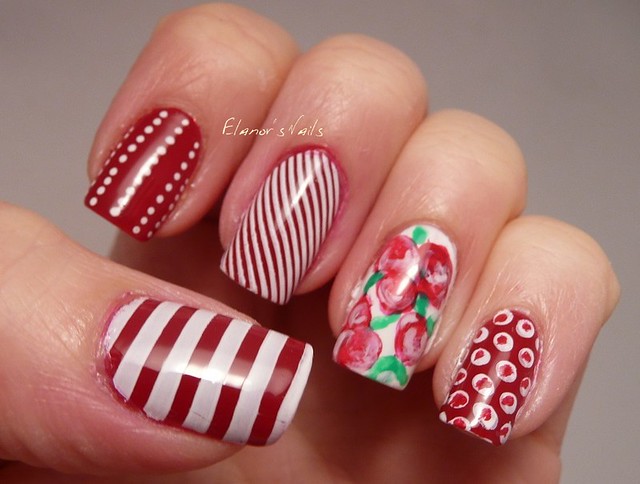
I hate this look! I like most of the nails individually (ish) but not together. I really like the wide stipes on my thumb - that's my favourite part of the stamping plate I think. I like the index finger, but I don't think it goes with the others. I like the middle finger's narrow stripes, but I really don't like how it makes the nail look not-red. It definitely looked more white than red at arm's length. Plus it looks as though the red has stained badly round the cuticle, or that I haven't cleaned up, and I swear that's not true! I think what happened is that when I stamped, the raised cuticle at the edge created a cushion which meant the white stamping didn't reach all the way to the edge. I don't like my roses at all - the colours don't go with the other nails, there are too many of them, and the leaves are messy. And don't even go there with my little finger! Initially these were nice white dots from the stamping plate, but I thought the nail looked too white, so I dotted more red on. Except that I was too lazy to get my dotting tool, and just used the edge of the brush I used for the roses, and it's a hideous mess.
Oh well, you live and learn! This all came off again straight away.
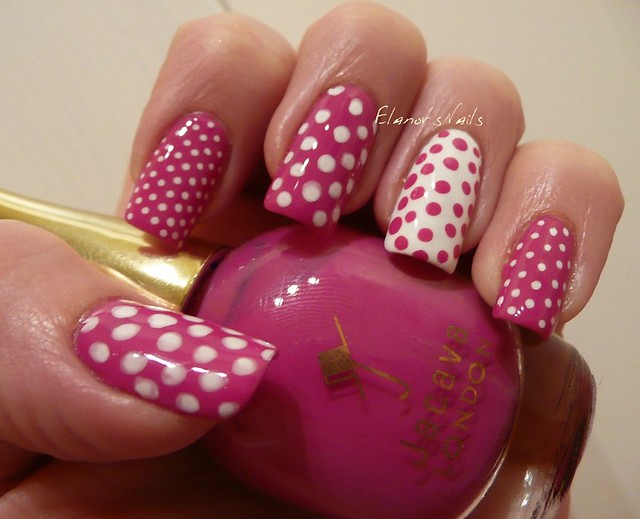
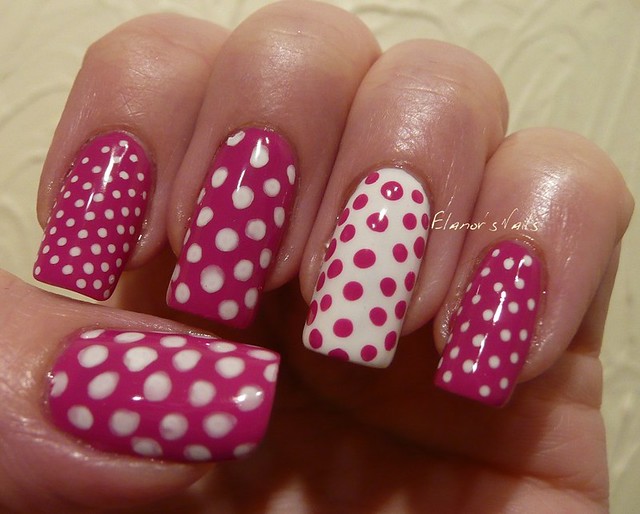
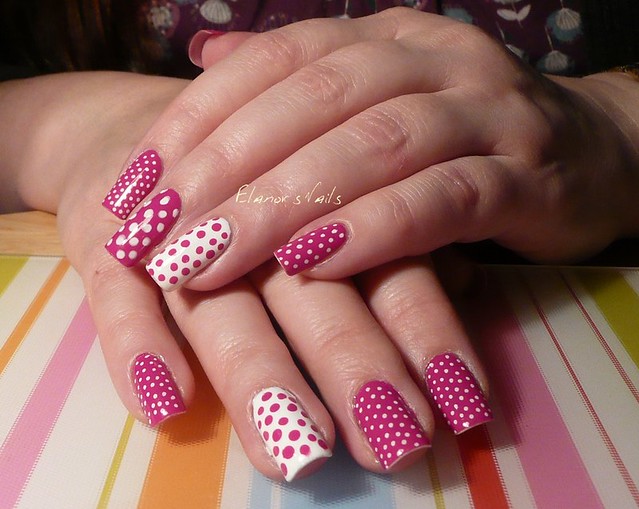
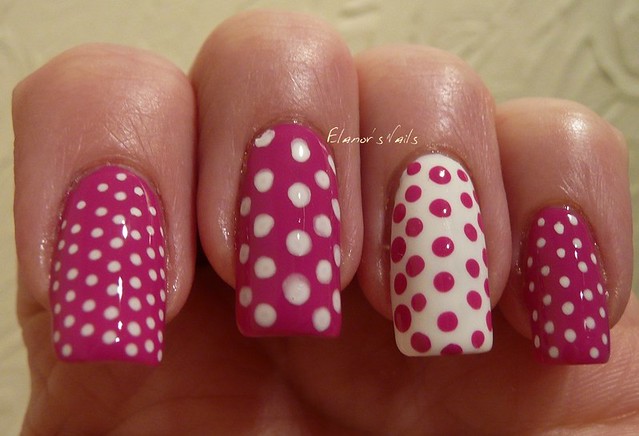
Today's nails are pink and white polka dots.
This is Essie Blanc and Jacava Blackberry Fool, and a white Barry M nail art pen, and all topped with Seche Vite.
I was so pleased with these, I even took a photo of my rarely seen right hand!
I deliberately made different sized dots when I did my first (left) hand. I wasn't confident I could do that neatly on my right hand though, so I made small dots only with the nail art pen - and I actually think I prefer the look that way.