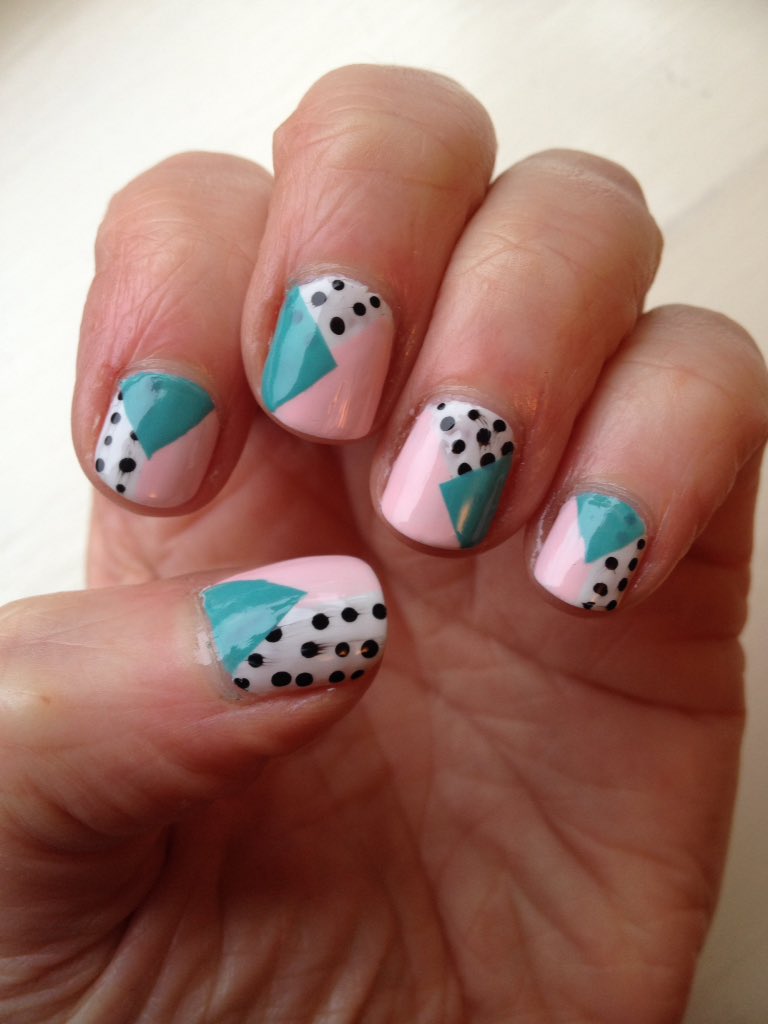
I opened a box of posh teabags yesterday (Pukka mint and matcha if you want to know) and loved the pretty design inside the box. Straight away I wanted to replicate it on my nails.
I started with a base of Barry M Golden Sands, the pretty creamy nude Boots limited edition with a bit of sparkle.
I then stamped over this with Barry M Satsuma and MoYou London Flower Power 06. I added topcoat a couple of minutes too early, which slightly smudged a couple of the nails, boo! Still, it's not massively visible.
I really like the overall end result.
What do you think?
Regular readers will know how much I love the Crucible Theatre in Sheffield - I've posted about it and done nails here, as well as having done snooker nails here. Last night though, I got a very exciting opportunity which deserved its own nails!
Every Christmas, the Crucible does a classic musical. This year's is Annie Get Your Gun, which I'm very excited about because OMG! Cowboys! Chaps! Saloons and comedy shooting competitions? What's not to love? It opens on Friday and runs to the end of January, and I've got tickets for a week on Saturday. But yesterday I was lucky enough to be part of a group of twitter fans who got to have an exclusive backstage tour, and it was SO MUCH FUN! We met the musical director, who took us to the remote orchestra pit under the stage and gave us some sneak peeks at the music secrets. We went to the wardrobe and costume department and chatted to the staff, and tried on lots of hats (and oohed and aahed at Kenneth Branagh's Richard III costume). We ate pizza, we chatted panto and musicals and theatre, and we got to watch some of the technical rehearsal for AGYG itself. There's a TRAIN! And hats! And chaps!
The nails are inspired by the production artwork, which is gorgeous!
You can read all about Annie Get Your Gun (including lots of photos and cute video trailers) here.
Anyway, on to the nails! I started with a base of Barry M Mustard, and sponged a mix of Barry M Satsuma, Full Throttle and Models Own Sarong Wrap to make the blended background.
I really liked how these looked, and wore these for two days as they were.
Tonight I added the bullet holes, using Konad Black sponged on and then Konad White dotted on over the top. I then mattified everything using Barry M Matte Topcoat. Then, because I never know when to leave well enough alone, I added a fringe to the ring nail, using nail glue and some edges from a fringe on an old scarf, as well as an accent stud. Because every cowboy mani needs fringes!
The fringe wasn't massively successful to be honest, but I suppose it's quite fun. It was too short to have any weight though, so it wouldn't swing very well.
I'll let you know what I make of the show when I go - I really can't wait!
I hate this time of year! It's wet and cold and clammy and work is stressful and everything is just generally uurgh. Hence the lack of blogging I suppose. I have done my nails, but I've only taken photos of some of them.
Anyway, here are some nails I wore a couple of weeks ago. I started with a gradient using China Glaze Riveting and Barry M Sparkling Amethyst. I wore these like this for a couple of days at work.
I then stamped over the gradient using Konad Black and.... probably one of the MoYou London XL plates, although I can't remember which one.
I really liked how these looked. The stamp is supposed to be floral, but I think it's ended up looking more abstract here. I love Riveting (the shimmery orange one) but haven't worn it for a really long time - I clearly need to dig it out more often!
Today's nails are an autumnal waterfall design. I started with two coats of Barry M's new black gelly, Black Forest. I was SO excited to hear that Barry M are finally doing a black in the gelly range - they've got so many colours and a really good formula, but so far no pure black. Anyway, it's finally here, and it's really nice.
Over the black, I then used a thin striping brush and added stripes of China Glaze Riveting and Colours by Llarowe The Heart Bleeds and Golden Rule.
I love how this came out! It's sparkly without being too over the top, and the colours blend together really nicely into an autumnal look.
What do you think?
Today's nails are some autumnal dots, using several different polishes.
I started with a base of two coats of Barry M Butterscotch Sundae. I then used dotting tools to add curved rows of dots using Barry M Cocoa, Chilli, Mustard and Twinkle Twinkle, and OPI DS Luxurious.
I topcoated over everything for extra shine and longevity. I wore these to work for a couple of days, and really liked how they looked.
I wore these bright gradient nails for four whole days this week, because I liked them so much.
I used four of the Models Own Polish for Tans for these - Sarong Wrap, Beach Fire, Barrier Reef and Island Hop.
These blended so easily, they were so easy to make a gradient with. I added topcoat for shine and longevity.
I was planning on stamping some kind of tropical flower design over these, but in the end never did, because I liked them as they were.
I wore these for a couple of days at the end of last week. I used 6 of the Models Own Polish for Tans for this watermarble.
I started with a base of Models Own Coconut Cream, and then used Island Hop, Barrier Reef, Boat Party, Sarong Wrap, Beach Hut and Beach Fire to watermarble over the top.
These polishes spread so easily on the water and are perfect for water marbling. I imagine I'll be doing plenty more of these in future.
I love how these came out!
SOMEHOW, I mysteriously acquired these fabulous Models Own colours today. They just fell into my basket when I wasn't looking.
I mean, oof. Look at them! Some of them are from the new 2016 Polish for Tans range, and a couple (I think the yellow and the bright orange) are from older ones that I didn't have.
Anyway. This is what I did with them. I used the base colour I was already wearing (Barry M Fondant) which had been on for a couple of days) and some What's Up Nails vinyl stencils, and sponged on random blobs of all the new polishes.
I love how this came out! The stencils were a bit fiddly to use, especially on my other hand, but I'm happy with the result, and I'm hoping I can keep these on for a couple of days.
There are one or two splodgy areas where the polish went under the stencil, but I'm choosing to pretend you can't see them.
I live near Sheffield, and there is currently a fantastic art installation and charity fundraiser going on across the city, called the Herd of Sheffield. You can read more about it here. To cut a long story short, Sheffield is full of elephants - the big ones have been created by various artists, and the small ones have been made by local primary schools. There is SO MUCH nail art inspiration amongst them all!
Today's nails were inspired by this theatrical baby elephant, Nelly Noodle, who is inside the Crucible (my very favourite Sheffield place!). I LOVE her toenails.
I did a simple skittle using Barry M Guava and Key Lime, Illamasqua Prosperity, Essence Flashy Pumpkin and Barry M Blood Orange. I then used topcoat to stick on my smallest rhinestones in a random colour order.
I realised afterwards that I'd got the purple and the orange the wrong way round, but never mind!
I love rhinestones! I haven't worn any for ages, but now I see these, I can't think why! Look how they're reflecting in the sunshine!
So sparkly!
People always ask whether rhinestones are really messy and impractical, but if you stick them down with topcoat and then topcoat over them, they pretty much stay in place through a normal day.
I will not be leaving it so long til I use rhinestones again! And I will definitely be doing more nails based on the Herd of Sheffield elephants!
I was so excited to be asked to review the June Nailbox! I've seen so many of these subscription boxes around for everything from dog toys to makeup to sweets, and only fairly recently heard about Nailbox. I'd heard good things, so I jumped at the chance.
Nailbox is a subscription service where for £13.50 a month, you get a box with
three or four different nail polishes, and one or two nail care or nail art items. These include lots of big brands like OPI, China Glaze, MoYou London, Nails Inc and many others. I was skeptical at first - I have so much nail varnish already, surely I would get a duplicate or colours that are similar to what I already have?
The June 2016 box is themed around Festival Fever, and contains 4 polishes and some nail art tape.
OPI Is Mai Tai Crooked - usually costs at least £9
Bourjois Turquoise Block - usually costs around £5.99
Rimmel Cheeky Chap - usually costs around £2.99
Essie Jazzy Jubilant - usually costs around £7.99
Elegant Touch Metalllic Nail Art Tape - usually costs around £4
So I calculate the value of the box at around £30, which is obviously lots more than the £13.50 the box costs! In fact in some shops, you couldn't buy one bottle of OPI for that amount.
It was also a big plus in that there were no duplicates in my collection, and the OPI and the Essie weren't even similar to any polishes I own. The nail art tape is gorgeous! There are five long strips each of 6 different colours. I use striping tape from time to time, and not as often as I'd like, because I generally find the rolls really fiddly to use. I love the idea of having nice short strips all ready for you to peel off the card! Plus, look at that third one down! It's copper, but it's full of rainbows in the light!

So, what did I do with the contents? I decided to try two different looks. First up is a floral design. I started with a base of the Rimmel, which is a one coater that applies nicely and dries to a matte finish. Then I freehanded some leaves with the Bourjois, and flowers with the OPI. I found that the green didn't really contrast with the blue enough to show clearly in the photos, but it was more obvious in real life. I sponged a bit of the glitter from the Essie into the flower centres and topcoated everything. I wore these nails for two days.
My thoughts about the polishes after making this first design was that the Rimmel was really nice, and I really really like the peachy orange of the OPI. I didn't feel I used enough of the Essie or the Bourjois to really comment.
Next up I wanted to swatch all the colours individually. I made a skittle across all my nails, and then used the tape to make a rays design on two of my nails.
The green swatched beautifully - it applies really well and is another one coater. The OPI is a gorgeous colour, but is a bit thinner and streakier than the other two, and needed two coats. I preferred to topcoat the Rimmel one, as I wasn't crazy about the matte finish.
I did the ray design freehand and then added the tape to cover any wobbles on the joins. I topcoated over everything just in case the tape wasn't sticky enough (I think it was though) and because I want to wear these for a couple of days.
Overall, I'm massively impressed! I'm trying really hard to spend less at the moment, but I am so tempted to sign up. The August box is called "Into the Sunset", which sounds gorgeous. It's my birthday in early September, so maybe I need to treat myself!
You can check out Nailbox on their website here.
This box was provided by Nailbox for my honest review. See my Disclaimer for more details.
I've posted before about how much I love the Crucible Theatre (see here for my previous nails) and I was there on Thursday night for Artistic Director Daniel Evans' leaving do, so I decided it was the perfect time to redo my Crucible nails.
I love the Crucible so much! It's my far my favourite theatre ever, and I go often (although not often enough for my liking!)
These are just a straightforward chevron skittle. I used nail vinyls from What's Up Nails to make these. The base colours are Barry M Blue Grape, Essence Flashy Pumpkin, Barry M Blood Orange, Illamasqua Prosperity and Barry M Key Lime. The black top colour is OPI 4 In the Morning.
I'm happy with how these came out. They're much tidier than my previous effort, and the colours are clearer.
I recently had a splurge on exciting nail vinyls from a US store, Whats Up Nails, after seeing them in some gorgeous blogger photos on Instagram. I was SO excited when the package came!
I've been wearing these nails for three days, and have only taken them off now because I managed to chip one. The base is Barry M Cotton. I then used the droplet vinyl stencils, and splodged on three of the new Barry M Lolly Gloss polishes, the orange one (Orange Fizz), the pink one (Pink Candy) and the red one (Cherry Drop) in a gradient-ish design. You can't actually see the change from red to pink that clearly, but I still think this works.
The vinyls are fantastic - they stick down and lie flat, and then lift off easily without leaving any sticky residue, just beautiful crisp lines.
The Lolly Gloss polishes are lovely - translucent and super shiny, and they smell of boiled sweets!
You can see the range of stencils and vinyls at Whats Up Nails here. I bought these, and used a discount code from Vics Nails, who did the gorgeous nails where I first spotted these vinyls.
My friend Wendy and I have both been lacking inspiration a bit recently, and on Friday we challenged each other to do 80s nails. Here are mine!
My nails are inspired by an awesome top I had around 1985ish. It was a batwing, slash neck, off the shoulder, cropped delight, with a graffiti style turquoise grid pattern, and some big orange roses. I have managed to recreate the pattern, if not the batwing amazingness.
The base is Barry M Cotton. I then stamped using Barry M Guava and Born Pretty stamping plate BP-40. I then freehanded the roses using lots of different oranges, and a yellow, and two greens.
I'm really pleased with how these turned out. They're a bit garish, but they're certainly how I remember the 80s. After I'd been wearing these for a few hours, it struck me what the background reminded me of - J cloths!
I wore these Out last night (yes, I did both hands) and just as I got home, one nail on my left hand broke right off! Luckily it didn't break down past the nail line, but I've had to file all my nails down pretty short to match.
Here are Wendy's! Aren't they ace? They're SO 80s.
Check her out on Instagram!