Showing posts with label stripes. Show all posts

Saturday, 19 December 2015

Candy Stripe Nails

I've been a bit lacking in enthusiasm for blogging recently. No real reason, I just haven't felt like it.  

Anyway, these are the nails I wore for a few days earlier in the week. Yes, I did both hands.


This is a base of Barry M Pearl, and the stripes were done using China Glaze Glow with the Flow and Jacava Crimson Crush and some striping tape. 


I deliberately made the stripes uneven in size and pattern as I knew if I tried to make them the same I wouldn't manage it!

Wednesday, 27 May 2015

Neon Skittle Mish Mash

I saw some gorgeous neon nails the other day that were a white background with lots of different neon looks on each nail. I can't find it now though! If anyone knows what it was I saw then please let me know so that I can see how mine compared and credit the inspiration!


Anyway, I started with a white base (Barry M Cotton) and then used dotting tools, striping tape and a fine brush to add various patterns. The colours I used were Models Own Sun Hat, Bikini and Shades, Barry M Superdrug Limited Edition 2013 and Cyan Blue, and Essence Flashy Pumpkin.  


I know these aren't perfectly executed, but I am happy with how they turned out. They're bright and colourful (brighter than these photos, which look a bit washed out) and cheered me up during a busy day at work. 

And just to prove that I do do both hands every time, here's my right hand!


I know it's less neat, especially with regards to the clean up (and don't look at my scabby cut on my thumb cuticle!) but it isn't significantly different from my other hand, so I'm quite pleased.   I was a bit surprised to see a nail blogger on YouTube the other day (NOT the same blogger who did the neon nails I liked) who had gorgeously decorated long nails on one hand, but short, bare nails on the other hand! I understand that sometimes someone will only swatch colours on one hand because it's coming straight off again, but I do nail art because I want to wear it, so I always do both hands!


Tuesday, 6 January 2015

Pink and Gold Negative Space Stripes

This was my first nail design of the new year. I've worn this for the last couple of days - which slightly brightened up my return to work.


I did this with striping tape over bare nails, then painting Barry M Dragon over the side sections, and Binky London Gold Rush along the middle section. 


It's simple and basic, but I really like it!
 

Saturday, 25 October 2014

Models Own Microdots and a Stripy Skittle

I bought Models Own Microdots ages ago and hadn't worn it yet because I just didn't know what to do with it. Tonight I thought it was about time to use it. 

Microdots is a clear base with tiny matte glitter pieces in royal blue, turquoise, red, orange and yellow.  I started with a base of two coats of Models Own Coconut Cream, which is my favourite off-white, and it smells fab to boot!

I then used tape stencils from She Sells Seashells to make bright stripes using 4 Barry M Gellys - Mango, Blood Orange, Greenberry and Blue Grape. 


I really like how this turned out! It looked nice glossy, but I thought I'd try it matte, so I added a coat of Barry M Matte Topcoat.

These make me think of deck chairs and beach huts for some reason. Not particularly seasonally appropriate, but there we go. The topcoat made the red bleed slightly, but it's not too obvious, so I'm not too bothered.  


Friday, 15 August 2014

Rainbow Accent Nail

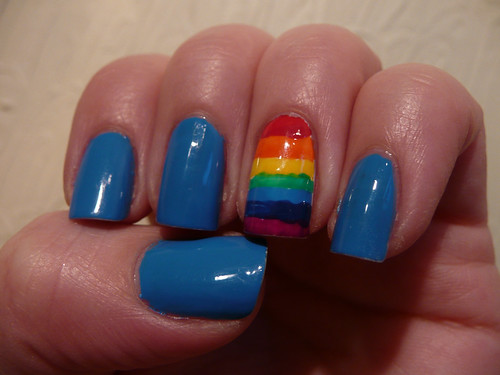
This week, one of my colleagues went to get her nails done at a salon, and asked for a rainbow accent nail. Apparently, they told her it couldn't be done! (They did a lovely skittle mani for her instead, but it was no rainbow!)  So I decided to do a rainbow accent nail myself. 


The main colour is Barry M Mist, one of the lovely Silk range. I then used a lot of different colours and lots of striping tape to make the accent nail.


Left to right in the photo above (I think!) are:  Models Own Pukka Purple, Rimmel Ultra Violet, Barry M Pink Punch, Barry M Blood Orange, OPI Roll in the Hague, Barry M Yellow, MoYou London Spring Green, Barry M Huckleberry, Barry M Guava, Barry M Blue Grape, and Models Own Pukka Purple again.


I'm really chuffed with how neatly this came out! It's a million times better than the first time I tried to make rainbow stripes!
What do you reckon? An improvement?

Sunday, 10 August 2014

Neon Stripe Nails - Take 2!

I loved yesterday's neon stripe nails (see post here) and today I wanted to take it up a level with even more stripes!  So I got out the striping tape and OPI 4 in the Morning, a lovely matte black with a bit of hidden shimmer, and got busy. 


This took surprisingly little time, and I really like the end result!


I'll be honest though - I haven't done this follow-up on my right hand! I'm not going out today, and I want to do something else for work tomorrow, so nobody will know that I didn't bother. Well... apart from you, obviously!


Saturday, 9 August 2014

Neon Stripe Nails

Today I wanted something colourful and bright, and as I'm a huge fan of stripes, I went for that. I started with a base of Models Own Coconut Cream, 2 coats. I am using Coconut Cream all the time recently! It's such a good base for things.

neon stripe nails

I then used striping tape to make fairly irregular stripes, and painted them using a bunch of bright polishes. I used Models Own Pukka Purple, Bubblegum and Bikini, Barry M Blood Orange and Blue Grape,China Glaze Turned up Turquoise, and a mini OPI orange whose name I can't remember. 

neon stripe nails

I was pretty pleased with how these came out! 

neon stripe nails

I don't know why I don't do stripes on my nails more often.    
neon stripe nails

The stripes might not be perfect, but they are cheerful, and they remind me of my living room rug, which I love. There are lots of stripy things in my house!
Fergus and Mickey!
 

Monday, 4 August 2014

Colour Me Crazy! Blue Stripes

While my post for Green week in the British Nail Bloggers Colour Me Crazy challenge was only just done on time, my post for Blue week is ready early! 
For Blue week, I decided to make stripes. I used all Barry M polishes for this look.


I started with a base of Barry M Huckleberry, and then added two strips of striping tape across each nail. 


I painted the middle section with Cyan Blue, and the tip of the nail with Blue Grape. 


I then removed the tape, added topcoat and a rhinestone, and left it at that. 


I love striped nails, but have never been able to make a stripy look that I was particularly happy with, somehow. But I'm pretty pleased with these! I even managed to get my other hand looking clean and crisp, which doesn't usually happen when I do tape designs on my right hand!


Friday, 25 July 2014

Colour Me Crazy! Yellow!


Week 3 of the British Nail Bloggers Colour Me Crazy! challenge is YELLOW. I was dreading this one a bit, because, you know... YELLOW! It's not a colour I wear often (or at all) because it's so... yellow. I have precisely two yellow polishes, and I've used them both here. 

As it turns out, I don't actually hate this look!  I used a base of Models Own Coconut Cream for a nice off-white base. I then added a medley of yellow designs using Barry M Yellow and Models Own Bikini. 

On the little finger, I made dots using a fine dotting tool and Bikini. On the ring finger I freehanded some roses with both polishes and a fine nail art brush. 

On the middle finger I used striping tape and both polishes to make a striped design. On the index I have a gradient of Coconut Cream and Bikini. On the thumb I was going to add a regular pattern of these yellow glequins, but they were so stuck together that I ended up just slapping on more so they all overlapped. I think in the end it was quite effective!


Thursday, 15 May 2014

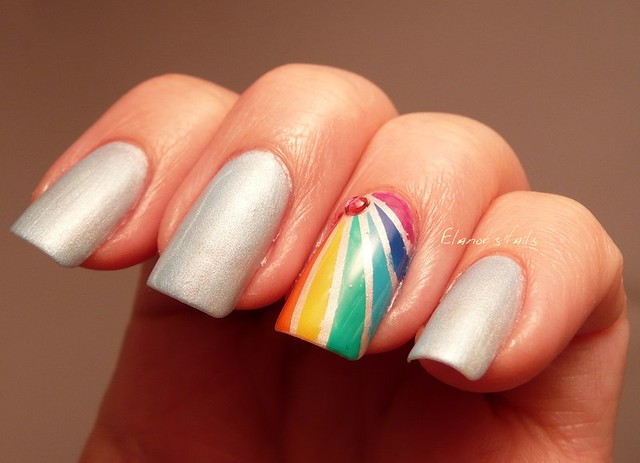
Rainbow Rays - Tape Nails with Rhinestones

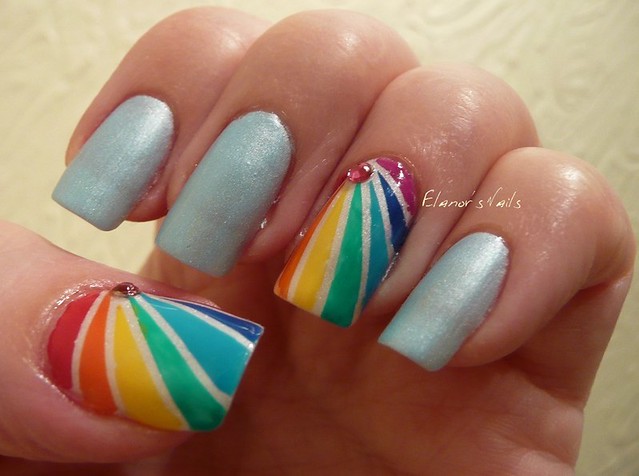
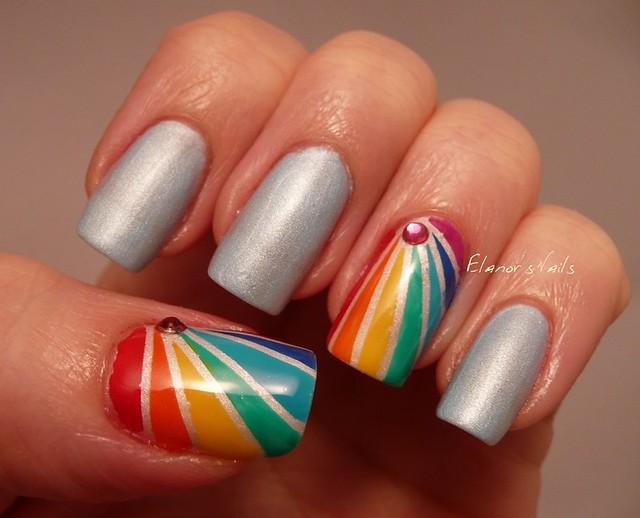
I'm SO excited about these nails!  I saw something similar on a blog ages ago and wanted to have a go, but thought they'd be really fiddly - as it turns out, it wasn't too bad at all!


I only did the design on two nails, just in case it took forever. The other nails are Barry M Mist - from my much loved Silks collection.  I love these, the formula is really good, and I really like the matte but slightly pearly finish. I used Pearl, the white one from the Silks range as a base on my thumb and and ring finger.


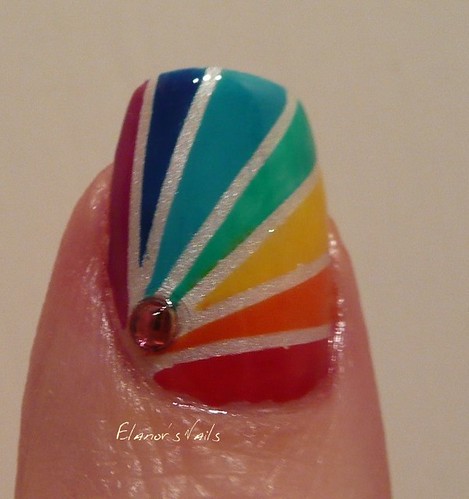
I then added striping tape in a ray pattern on my accent nails,  and painted each stripe separately.  The colours I used were:  Barry M Bright Purple, Barry M Cobalt, Barry M Guava, MoYou London stamping polish in Green, Barry M Yellow, Barry M Block Orange and Rimmel Pro Heart on Fire.


When the tape was removed, I was left with this lovely bright rainbow pattern. I then added a pink rhinestone to each nail, topcoated everything, and that was that. I love the result!


I've worn these to work yesterday and today and the stripes are still perfectly in place, so I'm leaving them on for another day tomorrow. The blue nails are a bit scuffed, so I'm going to carefully take that polish off, and do something different on those fingers - maybe even some more rays!


I've got loads of ideas now about how to vary this design! Maybe an ombre skittle, with dark to pale shades of the same colour, but a different colour on each nail? Or maybe a gradient effect across the nails. Or... ooh, all sorts!

I've also just joined a Facebook group for British Nail Bloggers - see my British Blogs Page for more details (and to add your link if you are a British Blog!) and have a browse of the lovely ladies' fabulous designs this week on the links below!

Tuesday, 29 April 2014

Polish Party - Inspired by Another Member

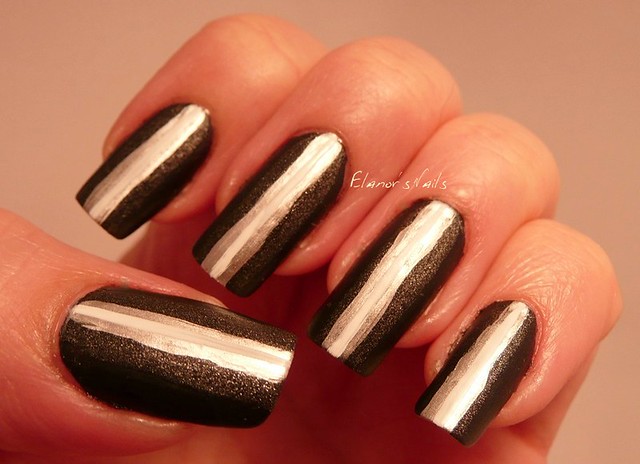
It's Polish Party time again, and this month's theme is 'Inspired by Another Member'. There are many very talented ladies in this group, and lots of designs I could have chosen, but one design I keep coming back to again and again is the gorgeous ombre stripe design by Madison at Fundamentally Flawless. She has done this design in pink, blue and green, all of which I love, and she has posted a tutorial, which makes it look super easy!


It isn't easy at all!


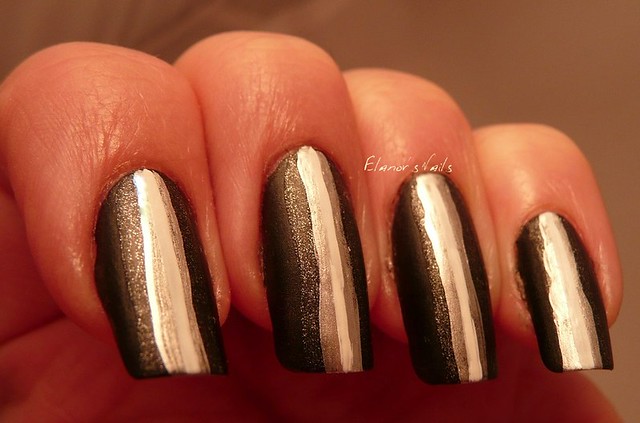
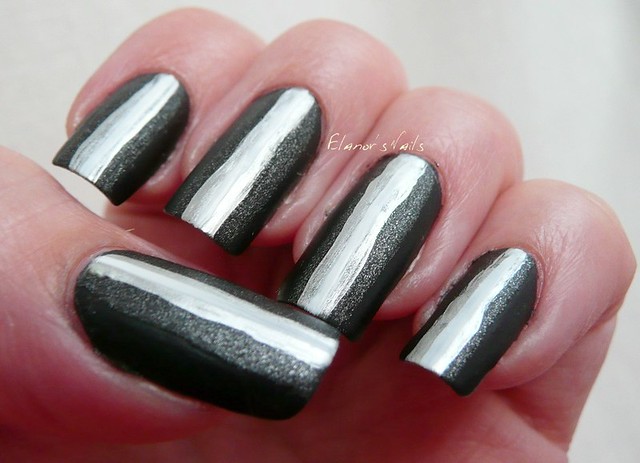
I love the bright colours that Madison used, but I wanted to see what it would look like in monochrome colours. I started with a base of OPI 4 in the Morning, a matte black. Next I used China Glaze Stone Cold, a gritty dark silvery grey. Then I used OPI Push and Shove, the bright silver chrome, using a narrow nail art brush. Finally I added a stripe of Konad White using a thin striper brush.

I'm not at all pleased with these: the contrast between the colours is all wrong, so instead of being ombre, it's more of a dark bit, and then a light bit. As you can see, the white line isn't really visible on top of the silver. My lines are too wobbly too for my liking - I found it really hard to keep a steady hand - I just can't paint in a straight line! 

Oh well - maybe I'll get it better next time!  

Have a look at the rest of the group's posts on the links below - as you can see, it wasn't just me who had a go at Madison's design!


Friday, 25 April 2014

Doctor Who Ring! And Fifth Doctor Nails!

I don't know how I've managed this, but somehow I have NEVER posted any Doctor Who nails! This is despite the fact that I am a fan (especially of classic 'old' Who) and that I have definitely done Who nails on more than one occasion. So now I'm remedying that. 


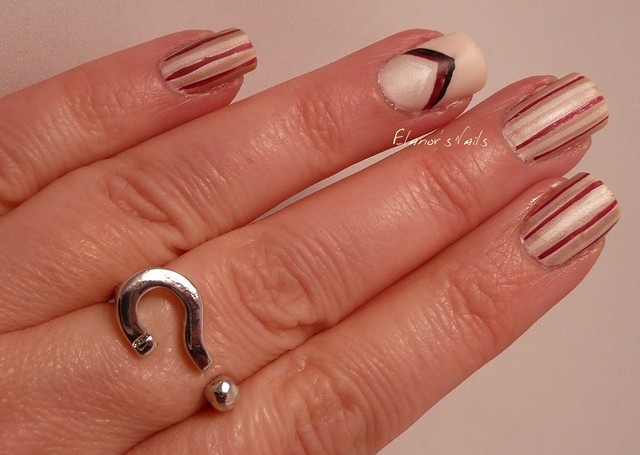
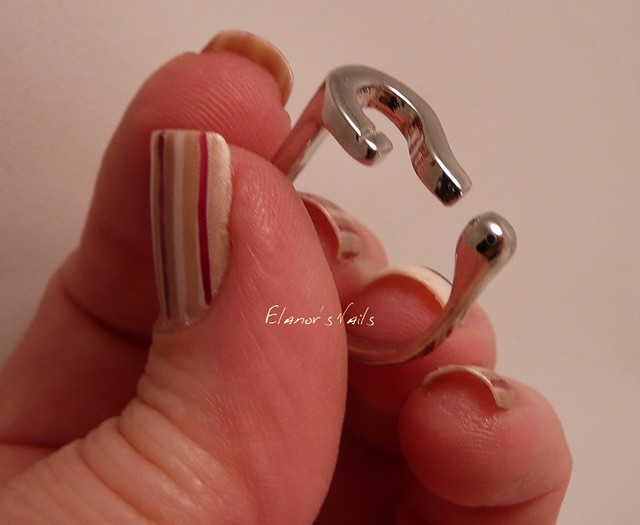
I bought this ring from the Born Pretty Store recently - it's described as "Question Mark Shaped Ring", but we all know that means DOCTOR WHO!  It's only $1.59 too, which puts even Claire's Accessories to shame (and I love their cheapy jewellery!) 


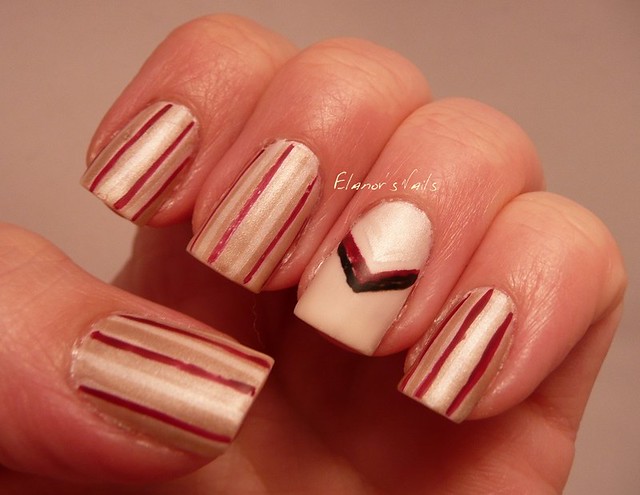
To go with this, I did nails inspired by my favourite Doctor - the Fifth. I love him LOTS. He had a lovely crickety outfit with lots of beige, and I ADORED him.  (Photo: BBC)


This is a base of Barry M Pearl (the white one from the Silk range), with stripes made using striping tape and Barry M Truffle and Crush - these are Five's trousers. For the accent nail, I used a base of Pearl, which I taped off and then added Essie Allure for his jumper. I used a Barry M nail art pen in black, and Crush again (with a striping brush) for the jumper details. I then added a matte topcoat.

While I know these aren't perfect, I'm pretty happy with them - I've been wanting to do Fifth Doctor nails for quite a long time and now I have, so I'm happy. And I LOVE this ring! It's really cute, and feels nice and solid too, so I'll definitely get some wear out of it.  


You can of course still use my discount code if you want 10% off any BPS items:


Sunday, 23 March 2014

Red and White Mish Mash - a Bit of a Fail

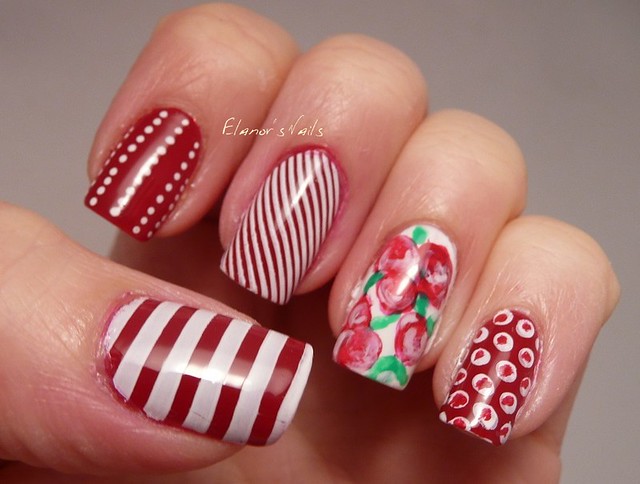
Today I wanted to do a mish-mash skittle look with red and white polishes. I started with Jacava Toffee Apple, and Essie Blanc on my ring finger. I then added some stamping using MoYou London Pro XL plate 01 and Konad white.  I also freehanded some roses on my ring finger using Jacava Toffee Apple and Jacava Crimson Crush, with some Barry M Spring Green.  I did the dots on my index finger with a Barry M nail art pen.


I hate this look! I like most of the nails individually (ish) but not together.  I really like the wide stipes on my thumb - that's my favourite part of the stamping plate I think.  I like the index finger, but I don't think it goes with the others. I like the middle finger's narrow stripes, but I really don't like how it makes the nail look not-red. It definitely looked more white than red at arm's length. Plus it looks as though the red has stained badly round the cuticle, or that I haven't cleaned up, and I swear that's not true! I think what happened is that when I stamped, the raised cuticle at the edge created a cushion which meant the white stamping didn't reach all the way to the edge. I don't like my roses at all - the colours don't go with the other nails, there are too many of them, and the leaves are messy.  And don't even go there with my little finger! Initially these were nice white dots from the stamping plate, but I thought the nail looked too white, so I dotted more red on. Except that I was too lazy to get my dotting tool, and just used the edge of the brush I used for the roses, and it's a hideous mess. 

Oh well, you live and learn!  This all came off again straight away.    

Monday, 30 December 2013

December Polish Party - Black and White

I'm really excited at the moment because I've joined a group of talented ladies called Polish Party! They post at the end of every month, with designs on a theme, chosen each month. See my Polish Party page for details of everyone!   This month the theme is black and white.  I decided to do a skittle of all different things, as I couldn't decide on one look.


First I painted my nails with base colours. On my thumb is my favourite black, Rimmel Black Out. On my little finger is Zoya Storm, a lovely glittery black.  On the other three fingers is Essie Blanc.  I then decorated.  On my little finger I stuck some small white flower stickers that were part of a birthday present from a friend. On my ring finger I freehanded (using a fine brush and a combination of Zoya Storm, Rimmel Black Out and Essie Blanc) what was meant to be roses. I'm quite disappointed with how they turned out though, as they look more like splodges than roses...


On my middle finger I used striping tape and a coat of Rimmel Black Out to make stripes. Again, I wasn't quite happy with these, as they aren't totally clean. It doesn't show at arm's length, but it looks messy to me in closeup.  On my index finger I used a tiny bit of a gingham nail decal from a Born Pretty Store set which I have just received (review and a proper look coming up very soon!) I love this one - gingham is so cute, and I managed to keep this neat. 


On my thumb I stamped with Konad White polish using my new Christmas present stamping plate, Mo-You London Rockstar 01. However, I managed to mess this up by not picking up enough of the design, leaving a blank bit at each end of the nail. I then made it worse by trying to fill the gaps, which just made it more obvious!


To finish with, I wondered whether it would look better matte, so I added a coat of Rimmel Pro Matte Topcoat.  I quite like this look, but the faults that make me dislike the look initially are still there.  Oh well! If you don't look too closely, they're ok!


Monday, 3 June 2013

Pink and Green - with a Striped Accent Nail

I've worn this combination of colours before (I do love pink and green!) but this time I decided to have a play with my striping tape, and ended up with this.
green striped nail 1
I've used Barry M Dragon and Greenberry, with the accent nail having a base of Essie Blanc. I added striping tape to the white base, then painted over with Greenberry before removing the tape.
green striped nail 2
The shimmer that's in Dragon (or Dragonfruit, as it seems to be mostly known online) is more visible this time round. I'm still not particularly wooed by the formula though - this is three coats, and my nails are feeling a bit thick. Two coats was still a bit streaky, but three does feel a bit gloopy.  Still - I really like the combination of pink and green, and the stripes remind me of Pacers (who remembers them?!) so I'm happy.

Tuesday, 18 December 2012

Candy Cane with Ruby Pumps

This is my favourite red ever, China Glaze Ruby Pumps. I've posted about it before, but it really is so lovely! 
candy cane 1
Today I decided to use striping tape to make a candy cane design on my ring fingers. The white is China Glaze Frosty, a sheer-ish white with lots of shimmer. This is three coats of Frosty, and two coats of Ruby Pumps on all my other nails.
candy cane
I'm a bit sad that the red and white bled into each other a bit when I added my Seche VIte topcoat, but it's only obvious in the macro shots, in real life it looks fine.
Related Posts Plugin for WordPress, Blogger...