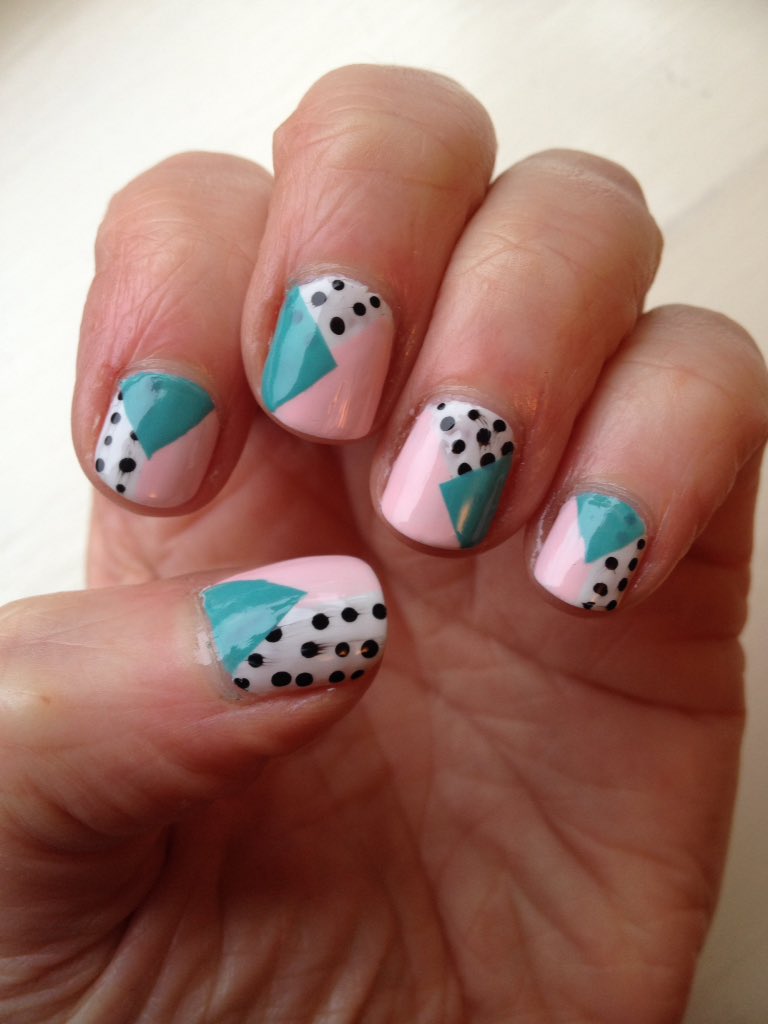
Tonight is the start of the baseball World Series, and the Cubs are there for the first time since 1945, and haven't won it since 1908. I'm not a huge follower of baseball these days, but I do really like it. I was forced to a game in New York in 2001, and absolutely LOVED it, and then got addicted to the old Channel 5 MLB shows back in the day. I went to a Cubs game at Wrigley Field in 2007, and loved it even more.
So today I've got Cubs nails. They're not perfect - they look much neater with my eyes than they do in photos! I wish the lines were cleaner.
I started with a base of Barry M Cotton and then used some stencils (which I won from Claire at Kerruticles in a giveaway) and Barry M Blood Orange to make the baseball nail. The pinstripe nails and the W (the Cubs 'fly the W' over Wrigley Field when they win) used tape and Barry M Blue Grape. The Cubs logo was rather wonkily freehanded using both colours and a thin brush.
I did do both hands, but just did the pinstripes and baseballs on my right.
I probably won't be watching the World Series this year, because it's not on telly here, and I can't be staying up til stupid o'clock to stream things. If it's on at the weekend and I'm not dead to the world, then I might... I would love to see the Cubs winning!
As promised, here are some of the nails I've worn recently, but hadn't got round to posting.
I wore these a couple of weeks ago. The pink gradient is sponged on and used Barry M Cotton and Sugar Plum.
I then used the mesh vinyls from Whats Up Nails, and painted on a stamping polish by Colors by Llarowe, Golden Rule. Because this was a stamping polish, it was a bit on the thick side, and maybe wasn't ideal for nail vinyls, as you can see in some spots the pattern isn't completely sharp.
Still, I think these looked pretty good! I especially like how Golden Rule looks in the sunshine.
My friend Wendy and I have both been lacking inspiration a bit recently, and on Friday we challenged each other to do 80s nails. Here are mine!
My nails are inspired by an awesome top I had around 1985ish. It was a batwing, slash neck, off the shoulder, cropped delight, with a graffiti style turquoise grid pattern, and some big orange roses. I have managed to recreate the pattern, if not the batwing amazingness.
The base is Barry M Cotton. I then stamped using Barry M Guava and Born Pretty stamping plate BP-40. I then freehanded the roses using lots of different oranges, and a yellow, and two greens.
I'm really pleased with how these turned out. They're a bit garish, but they're certainly how I remember the 80s. After I'd been wearing these for a few hours, it struck me what the background reminded me of - J cloths!
I wore these Out last night (yes, I did both hands) and just as I got home, one nail on my left hand broke right off! Luckily it didn't break down past the nail line, but I've had to file all my nails down pretty short to match.
Here are Wendy's! Aren't they ace? They're SO 80s.
Check her out on Instagram!
I've been feeling pretty disillusioned with blogging recently, but I have still been doing my nails (and apparently buying FAR too many Mo You London stamping plates!) So today, just a quick look at a couple of the designs I've been wearing.
These nails were more reverse stamping decals. I started with a base of Barry M Pearl, and used MoYou London Flower Power 04 to stamp using Konad Black, Barry M Dragon and Colors by Llarowe This Heart Bleeds.
I really like how these came out! There are a couple of smudgy bits in places, but I'm choosing to ignore them.
These blue nails are the ones I am wearing now - I've had these on for three days now.
I started by sponging on a splodgy, random base using lots of Barry M Gelly blues.
I then stamped using MoYou London Flower Power 08 and Konad White. I managed to get the design pointing in different directions on each nail, but oh well.
The MoYou London Flower Power plates are gorgeous! I had to buy six.
After my first reverse stamped decals the other day, I was itching to make more!
These ones use MoYou London Tropical 14 plate. I started with a base of Barry M Meadow, and stamped using MoYou London Spring Green. I filled in the flowers using several different China Glaze neons.
I was a bit disappointed with the blue flowers, because some of them overflowed a bit. I don't think it's massively obvious, but I wish they were neater.
I really like the design on the middle and ring fingers best - I think I wish I'd done that on all the nails now. Still, I do like the result!
I'm so excited about these nails! I recently bought a silicone nail art mat (I have the Bundle Monster Lotus mats in the small sizes) and was excited to have a go at making reverse stamped decals. My first attempt was really bad, and my second attempt was pretty bad, but I think that third time round, I've managed to crack it.
I used this tutorial by MoYou London, but there are loads of similar tutorials out there. By the way - it's so much nicer stamping using the mat instead of bits of kitchen roll!
I started with a base of one coat of Pantone 14-1220, a nude colour with a very thin consistency. One of my early mistakes was using Barry M Gellys, which are quite thick, and made me end up with a super thick and claggy decal. I then stamped using Konad White and MoYou London Pro XL 26, stamping onto the mat over dried topcoat.
I then used a variety of colours, including Barry M Sugar Apple, Sugar Plum, Blood Orange and MoYou London Bahamas Punch and Spring Green, and a tiny brush to fill in the details in the pattern. I used 5 different designs from the stamper so that each finger was different. Instead of sticking the design down with topcoat (another early mistake, adding another extra layer) I added the second layer of my base colour, and then applied the decal while that was still tacky.
I love the thumb design best! And I match my shower curtain! (Ikea, Cath Kidston design)
I really like the silicone mat - I didn't need it to keep my desk clean, as I already have a glass placemat - but it's great for stamping, nice for swatching and testing designs, works really really well for decals, and just cleans up with acetone and folds up to put away if you want to. I'm surprised at how few of my stamping plates are suitable for making decals though, as very few have a pattern that can be filled in. I'll have to buy some more! What a pity...
This is another of the new Barry M Gelly range for 2016, Cream Soda. This is another off-white creme, this time with a slightly greeny-yellow tinge.
This is two coats, with topcoat. I like this colour, but I'm not sure that it's as flattering with my skin tone as some of the other pale Gelly shades.
Formula is the usual good Barry M Gelly quality, and I'm starting to get more used to the big brushes now. I didn't like them when they first came out.
I stamped over this using Models Own Chrome Gold and MoYou London Pro XL14. I think this looks really pretty, and the gold tones down the greeny shade in the polish.
I've been a bit lacking in enthusiasm for blogging recently. No real reason, I just haven't felt like it.
Anyway, these are the nails I wore for a few days earlier in the week. Yes, I did both hands.
This is a base of Barry M Pearl, and the stripes were done using China Glaze Glow with the Flow and Jacava Crimson Crush and some striping tape.
I deliberately made the stripes uneven in size and pattern as I knew if I tried to make them the same I wouldn't manage it!
Today is NET Cancer Day and lots of the British Nail Bloggers are doing nails in support of this. I'd never heard of NET (neuroendocrine tumour) cancer until last year, when our nail blogger friend Emma (of Em's Little Corner)'s husband was diagnosed. Thankfully, he is on the mend.
The NET organisation uses the analogy of the zebra to raise awareness, effectively saying that if something looks like a horse and clops like a horse, the mostly likely chance is that it is a horse. However, it could possibly be a zebra, and so people shouldn't necessarily write symptoms off as the most likely cause, because it could be something else. Emma's post (see links below) explain it so much better than I can!
Anyway, on to the nails, which are pink and zebra, in honour of the NET Cancer logo.
I was a bit scared of doing zebra nails, because I've never done them before. I don't have any zebra stamping plates, so I had to freehand these. I was quite apprehensive!
I started with a base of two coats of Barry M Coconut on three nails, and two coats of Barry M Pink Punch on the other two. I then used a black Barry M nail art pen to freehand the zebra stripes. I also added a tiny French tip on the pink nails using Models Own Gold Chrome.
I topcoated over the pink nails, and used a matte topcoat over the zebra nails.
I am so pleased with how these turned out! My right hand is also not bad at all, so I'm really chuffed with myself! If I look at them too much, I start thinking they look like twigs instead of zebra stripes, so I'm trying not to look too closely!
For months now, every time I have a bath I've looked at my bathroom window and tried to work out how I could get that on my nails. The flowery pattern against a pale sky is so pretty!
Today's nails aren't really anywhere close to it, but they were inspired by it, so they count!
I did a gradient using Barry M Huckleberry, Essie Maximillian Strasse Her (I still don't understand that name!) and Barry M Grey.
I then stamped over it using Konad White and the MoYou London ProXL 14 plate.
What do you think? Success, or not?
Tonight I've got one last post for June. I don't usually do nails or post them this late in the evening, but I was in the mood for a gradient, so here I am.
This gradient started with a base of Barry M Coconut, the off-white Gelly. I then sponged on a gradient of Barry M Huckleberry and Blue Grape. Sadly, I switched to bargain pound shop sponges, and they're rubbish - there are lots of little lumpy particles stuck to my nails!
After the gradient, I used Konad White and MoYou London plate Mother Nature 14 to add the stamping. The design is actually branches and blossom, but I think its abstract-looking enough to look nice in this colour scheme.
I toyed with the idea of keeping my French mani plain for a day, but I just couldn't do it!
I used a fine paintbrush with China Glaze Mingle with Kringle and Jacava Blackberry Fool in order to do this design. It's only simple but I do like it.
The gold lines are a bit thicker than I meant to do, but I suppose that doesn't matter.
What do you think?
Just a quick post for now to show you what I've just put on my nails. I realised earlier that I'd NEVER worn a classic French tip mani, so I thought I'd try it.
This is Essie Blanc and Essie Mademoiselle. I used tip guides to get a clean line.
I like how this looks! It's very plain though, so I'm going to do some kind of nail art over the top.
This morning, Emma from Em's Little Corner spotted this gorgeous mani by PiggieLuv and shared it with me because she knew I'd got the OPI Color Paints recently.... and wow! What a fantastic design! I knew I had to have a go at doing my own version.
I did mine a bit differently, as I didn't want to paint white over the top of glitter and end up with it lumpy, and certainly didn't trust myself to do neat lines freehand. Instead, I started with a base of white (Barry M Cotton) and use curved tip guides to tape off the central section of the nails.
Then I painted a silver glitter over the curved central section. This is 2true Sequins Christy, which is a lovely dense one-coater but with small particles which won't overlap the tape too much.
I topcoated over the silver to make it smoother (Christy has a rough finish to it), and then used the Color Paints to paint my rainbow. I removed the tape, added more topcoat, and there you go.
It's not as fantastic as PiggieLuv's, but I'm pretty damn chuffed with this! The Color Paints look fab over glitter, and I love the contrast of white and the colours. I included this blurry photo because it shows how glossy and juicy these colours are!
What do you think?
I've got another Born Pretty Store stamping plate to show you today, with two separate looks.
This is plate BP-50, which you can see for sale here.
The first look I did was a bit of a failure. Nothing to do with the plate, it was just colour choices. I did a blue and white water marble, using Barry M Cotton and Cyan. Then I stamped using Barry M Silver Foil. The plate itself is really good - the design transferred really clearly. However, the silver was just too pale to really show clearly, I think. It's pretty, but I wish I'd stamped using dark blue or something.
The second look I did was a gradient of Barry M Cotton and Key Lime, and then stamped using the leaf design and MoYou London Spring Green. I love how this came out!
The leaf design is really pretty, and I think it's my favourite on the plate.
The plate is currently $2.99, but you can get 10% off using my discount code.
I received this product for review purposes, but words and opinions are entirely my own. I do not receive anything if you use my discount code, although when it's been used ten times, BPS will let me host a giveaway for my readers! See my Disclosure page for more details.
I was going to do my nails this evening and do a proper post, but I'm ridiculously tired and a bit headachy, and I just want to go to bed. So in the meantime, here are a couple of photos of a watermarble I did a while ago, and which I never posted for some reason.
I can't even remember what polishes these were! I suspect they are Barry M Gellys, but I'm not sure.
I think I didn't post these because I'd broken my ring finger nail, and it was so short and stubby. Now I look at them though, they're pretty!
I haven't done a watermarble in a while - maybe it's time to do one again!