I opened a box of posh teabags yesterday (Pukka mint and matcha if you want to know) and loved the pretty design inside the box. Straight away I wanted to replicate it on my nails.
I started with a base of Barry M Golden Sands, the pretty creamy nude Boots limited edition with a bit of sparkle.
I then stamped over this with Barry M Satsuma and MoYou London Flower Power 06. I added topcoat a couple of minutes too early, which slightly smudged a couple of the nails, boo! Still, it's not massively visible.
I really like the overall end result.
What do you think?
Yesterday was Shakespeare's birthday, and the 400th anniversary of his death. I go to the theatre a lot, and love a bit of Shakespeare, so I did nails.
I started these with a base of a splodged on mix of three beigey-nude colours. I needn't have bothered, as they were so similar I should just have painted them one of the colours. I had been aiming for a sort of parchmenty unevenness to the colour. Oh well.
I then stamped using three different MoYou London plates. The skull was Rockstar 01 and Konad Black, the script was Scholar 02 and Barry M Cocoa, the quill was also Scholar 02, with Konad Black, and the roses were from Pro XL 26 and Colors by Llarowe The Heart Bleeds. I added matte topcoat to all the nails except the one with the roses, because I wanted them to look sparkly. It isn't hugely obvious, but the text is the opening of Romeo and Juliet.
I'm so excited about these nails! I recently bought a silicone nail art mat (I have the Bundle Monster Lotus mats in the small sizes) and was excited to have a go at making reverse stamped decals. My first attempt was really bad, and my second attempt was pretty bad, but I think that third time round, I've managed to crack it.
I used this tutorial by MoYou London, but there are loads of similar tutorials out there. By the way - it's so much nicer stamping using the mat instead of bits of kitchen roll!
I started with a base of one coat of Pantone 14-1220, a nude colour with a very thin consistency. One of my early mistakes was using Barry M Gellys, which are quite thick, and made me end up with a super thick and claggy decal. I then stamped using Konad White and MoYou London Pro XL 26, stamping onto the mat over dried topcoat.
I then used a variety of colours, including Barry M Sugar Apple, Sugar Plum, Blood Orange and MoYou London Bahamas Punch and Spring Green, and a tiny brush to fill in the details in the pattern. I used 5 different designs from the stamper so that each finger was different. Instead of sticking the design down with topcoat (another early mistake, adding another extra layer) I added the second layer of my base colour, and then applied the decal while that was still tacky.
I love the thumb design best! And I match my shower curtain! (Ikea, Cath Kidston design)
I really like the silicone mat - I didn't need it to keep my desk clean, as I already have a glass placemat - but it's great for stamping, nice for swatching and testing designs, works really really well for decals, and just cleans up with acetone and folds up to put away if you want to. I'm surprised at how few of my stamping plates are suitable for making decals though, as very few have a pattern that can be filled in. I'll have to buy some more! What a pity...
Oops! I haven't posted since before Christmas, sorry! I wasn't in the mood for nails particularly for a couple of weeks, and then last week I had a really nasty nail break so my left hand looked quite unpleasant. I'm still missing a big chunk of nail on my middle finger, but at least it's not too awful now.
Anyway, I was contacted recently to ask if I'd like to review a new polish brand, and I was particularly excited to see that they're Scottish! I'm not Scottish my self, and I don't live there now, but I was at uni in Dundee and spent 4 very happy years living there.
Tami Beauty is a new brand, and they sent me all three of their colours to try out.
Don't they look pretty? Left to right, here are Gleneagles Glamour, Lady of Lomond and Skibo Sunset.
Check out their website here. Tami polishes are 3-free, and are not tested on animals in any way.
I tried Lady of Lomond over new year, before I had my broken nail.
This is a pale green polish with lots of holo particles and tiny glitter.
This is two coats, with topcoat. The formula is nice - a little runny, and dragged a couple of bare patches on the first coat, but the second coat was perfect. This dries slightly matte, so I added topcoat to smooth it and add shine. The brush is nice - fairly short and slim, and easy to control.
Isn't this pretty? I wore this for three days, and the wear was excellent. There was no chipping, peeling, shrinkage or anything else. Removal was a little tricky as the glitter was pretty solidly fixed, but it was nothing that the foil method couldn't solve.
Next up was Gleneagles Glamour, which is a pale nude-pink with the same holo and glitter as Lady of Lomond. The formula seemed slightly better, as I didn't get the dragged patches.
This again is two coats, with topcoat.
I really like how this one looks. It's sparkly and pretty, without being OTT, and I think would be work-appropriate as well as very pretty.
It's such a pretty, delicate polish, don't you think? You can see the rose-gold glitter particles there, which make it a really flattering shade.
The last of the three is Skibo Sunset. This one is a bright cerise pink holo. It doesn't have the glitter particles of the other two, and dries with a shinier finish.
This is two coats, with topcoat. Again, the application was really good, and the polish dried quickly. This is the least unique of the three shades, but it's really pretty, especially in bright light, where the holo is more visible.
Isn't it lovely?
I really liked all three of these polishes. The formula is good, application is nice, the brush is the sort I like best. They are available on the Tami website for £9 each, or £21 for the set. I think the £9 price is perhaps a little steep for a new brand, when you compare it to brands like Nails Inc or China Glaze, but then again it's a small company and I can understand why production costs more. And the polishes are really really nice, so it's a big thumbs up from me! I'm looking forward to seeing what their next colours are going to be.
These polishes were provided for my honest review. See my Disclaimer section for more information.
Today's nails were done using nine different Barry M colours, and a fine paintbrush.
I started with a base of Truffle, the neutral nude colour from the Silks range, and then went crazy with a painbrush and several Gelly colours: Cotton, Mango, Mustard, Papaya, Satsuma, Key Lime and Watermelon.
The roses were a very odd work in progress. First they looked absolutely AWFUL. Then they looked worse. I kept dabbing away and adding extra swirls, and extra colours...
Then they looked merely disappointing. Then they looked acceptable. Then all of a sudden, they looked really nice! At least, I think they do!
I even think my right hand looks ok!
What do you think?
I liked my rainbow dots (see here!) so much that I did more dots for today's nails.
This is a base of Barry M Truffle. I then dotted across the middle section of the nails using Models Own Sunhat, Shades, and Diamond Luxe Radiant Pink, and Barry M Rose Hip. I added topcoat once everything was dry.
I love the contrast of the bright, zingy pinks with the neutral base.
I'm addicted to dots at the moment!
The next plate I tried from my delivery from Born Pretty Store, was BP-48, which has a large paisley floral design covering half the disc (great if you have really long nails!), a pretty rose design, a butterfly, and a lacy pattern that's easily large enough for a full nail.
I wore a base of Essie Sand Tropez, which is a fab nude polish that I really like. This is two coats.
I then stamped using Konad White and the lacy pattern that takes up a quarter of the stamping plate. As you can see, I misjudged this on my thumb slightly and missed a bit, but that was nothing to do with the plate, and everything to do with my clumsiness.
I love how this turned out! It's such a delicate design that it could easily have become smeary or patchy, but the plate etching is obviously good, because the pattern transferred easily and stayed perfectly clear.
I'm really impressed with these Born Pretty plates - the quality is good, and the designs are really nice. And they're really good value! This is available on the Born Pretty website here, for $2.99 - and you can get 10% off if you use my discount code too.
This stamping plate was provided for honest review. See my Disclaimer section for more details.
I was intrigued to see whether the Models Own Chromes were any good for water marbling, and I wasn't ready to take off yesterday's Barry M Lychee, and I wanted to do something subtle and non-gaudy for once. I ended up with this look:
This is a base of Barry M Lychee, and then a water marble created just using Models Own Gold Chrome and a clear polish.
I really love how this came out!
At arm's length, this just looks like a nude polish with perhaps a sheen of metallic shimmer. Then when you look closer, you can see the swirly pattern, which I think came out really nicely.
The colour and the pattern reminds me of wood grain, or the gold-edges pages of a fancy old book.
The Models Own Chromes seem to work really well for water marbling - they spread out nicely on the water and still cover really well. I tested out a few of the other colours on some test nails too, and they all look great. I'm sure I'll have more coming up over the next few weeks.
Incidentally - I had a moment of brain freeze here. I used latex for clean up on nine of my fingers. It's easy and clean and quick, and means hardly any actual clean up. But I forgot to use it on my right thumb, and spent five minutes trying to find the edge of the latex to peel it off, before I realised that there wasn't one, and that I'd managed to dip almost my entire thumb into gold paint. That took quite a bit of cleaning up!
I was all set to do some more water marbling tonight, and wanted to start with a base of Barry M Lychee. But then somewhere along the line I realised how lovely Lychee is on its own, and that I'd never worn it alone, or posted it here without it being a base for nail art. So I decided to water marble tomorrow, and just wear Lychee for now.
I was surprised when I checked and found that Lychee was released in 2013! I had no idea I'd had it for that long. This is two coats, without topcoat.
Lychee is lovely - it's a fantastic formula, and the colour is so nice. It's subtle and work-appropriate, and very flattering, I think.
It's a great base for nail art - it has featured on this blog in several posts, but never on its own.
I don't know how I've managed this, but somehow I have NEVER posted any Doctor Who nails! This is despite the fact that I am a fan (especially of classic 'old' Who) and that I have definitely done Who nails on more than one occasion. So now I'm remedying that.
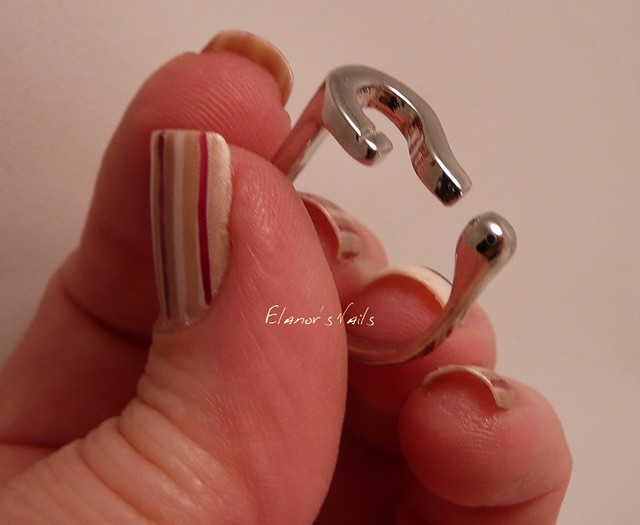
I bought this ring from the Born Pretty Store recently - it's described as "Question Mark Shaped Ring", but we all know that means DOCTOR WHO! It's only $1.59 too, which puts even Claire's Accessories to shame (and I love their cheapy jewellery!)
To go with this, I did nails inspired by my favourite Doctor - the Fifth. I love him LOTS. He had a lovely crickety outfit with lots of beige, and I ADORED him. (Photo: BBC)
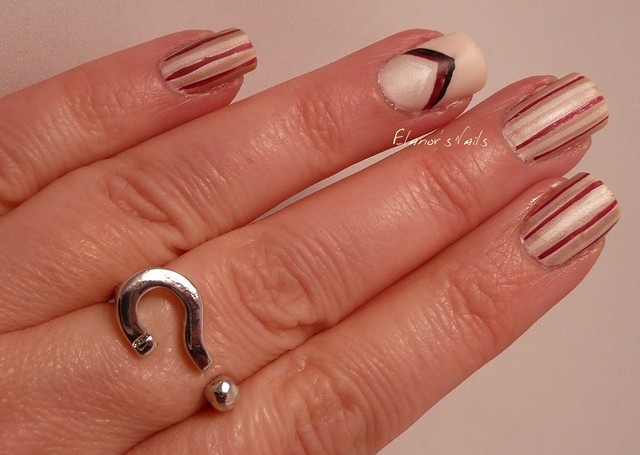
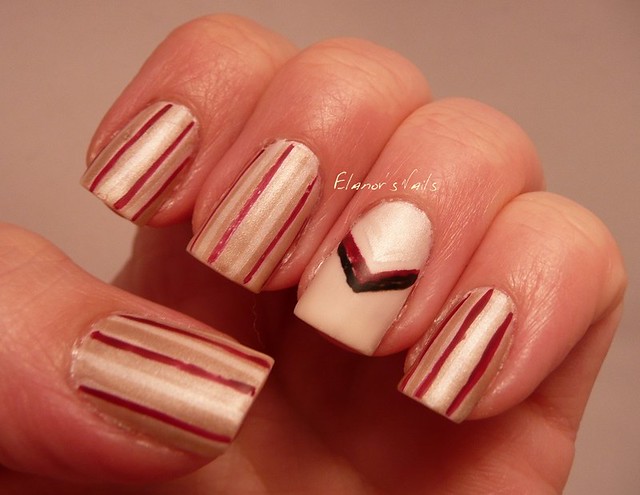
This is a base of Barry M Pearl (the white one from the Silk range), with stripes made using striping tape and Barry M Truffle and Crush - these are Five's trousers. For the accent nail, I used a base of Pearl, which I taped off and then added Essie Allure for his jumper. I used a Barry M nail art pen in black, and Crush again (with a striping brush) for the jumper details. I then added a matte topcoat.
While I know these aren't perfect, I'm pretty happy with them - I've been wanting to do Fifth Doctor nails for quite a long time and now I have, so I'm happy. And I LOVE this ring! It's really cute, and feels nice and solid too, so I'll definitely get some wear out of it.
You can of course still use my discount code if you want 10% off any BPS items:
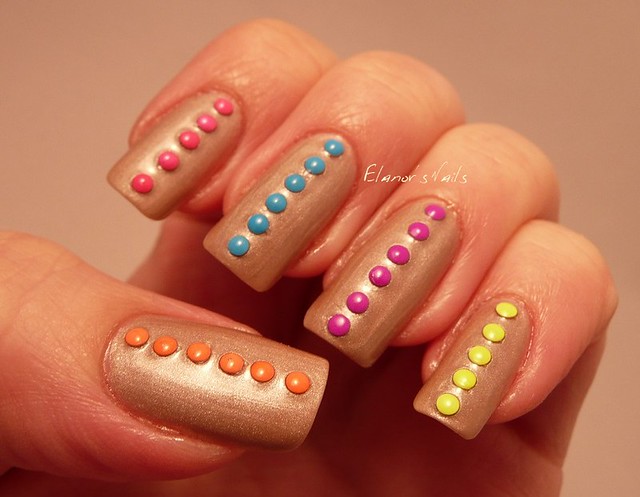
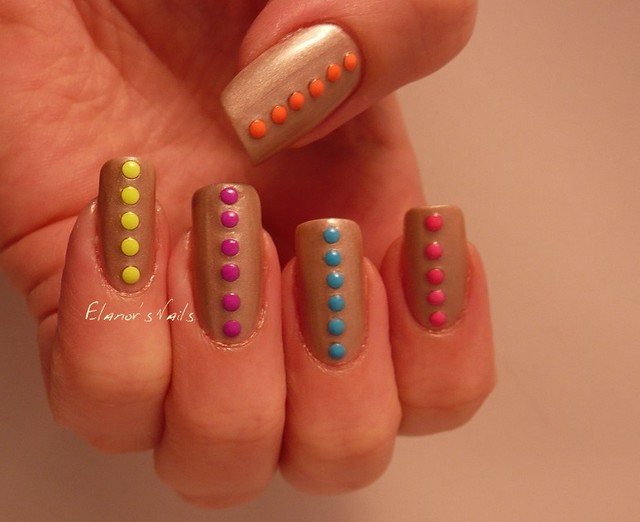
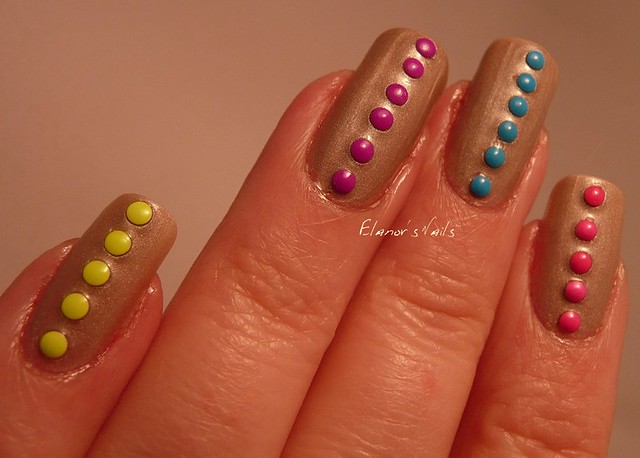
As I like the Barry M Silk polishes so much, today I bought the two other colours that I hadn't bought previously. I think it's the first time I've every owned a whole collection of something! This is Truffle, the nude coloured one, which I decided to wear with some neon studs from the Born Pretty Store.
Truffle is just as good as the other Silk polishes. This is two coats.
The studs are this item from the Born Pretty Store, which I reviewed previously here and here. I really like these studs - they're bright and cheerful, and are thin and light enough to stay stuck down easily with topcoat.
As always, you can use my 10% discount code when buying any items from BPS - and there is free shipping too.

These studs were provided for review purposes.