The other week, after a particularly difficult few days at work, I took an impromptu day off (I had to use up one more day of annual leave before the end of the academic year) and went to the seaside! I'm not a fan of traditional beaches and sitting around sunbathing - I prefer wild beaches with long walks, that sort of thing. I went to Gibraltar Point near Skegness, walked for quite a long time and had a small picnic. Whilst there, I kept looking at the sky and sand and thinking about a nail design...
I also lay in the dunes for a bit and dozed, and started thinking about how pretty the sand was, and about 'liquid sand' nail varnish, and wondered what sand would look like on nails. I took a handful of sand home with me in a pocket, and today, this is what I've made.
This is Barry M Huckleberry and Vanilla, made into a gradient. On my ring finger, I painted a coat of Vanilla and then dipped my nail into the sand.
In the end, the gradient doesn't actually look much like the actual sand/sky on the day, but I still like it. I think pale blue and pale brown go really well together. And while it isn't as sparkly as I'd hoped, I do like the way the sand looks. I hadn't really realised how many colours there are in sand!
The sand felt really secure, and I'm pretty confident it would have held up for a day on my nails, but I decided to add topcoat, hoping it would making it really shiny.
I was a bit disappointed with this though - it does look like wet sand, but it's less shiny rather than more shiny, and it looks a bit muddy. Oh well, it was a fun experiment!
Today I have some really nice new polishes to show you. This is a new polish brand called Binky London. Apparently they're something to do with a celeb from a reality programme, but I'm old and don't watch that kind of thing, so I have no idea! But when I was offered some review samples I jumped at the chance. I have two different polishes to show you, Gold Rush and Blue Denim.
To start with, this is ONE coat (yes, really!) of Gold Rush. This is from the textured glitters range - there are currently five colours, and wow, the purple looks amazing!
Application was a little tricky to start with, as the brush is quite wide and flat, and some of my nails are very narrow, but once I got used to it, it was easy peasy. The polish is quite thick and very opaque, and one coat was perfect.
This glitter is really sparkly, and the texture is nice - rough, without being lumpy or snagging on things. I think without topcoat, this was a subtle enough glitter to wear for work (if you're one of those people who can't wear bright colours for work. Not me - I wear anything, anytime!)
I then wanted to see what it looked like with topcoat, and WOW! Just look at it! Isn't it beautiful?
I stamped over it too (see this post) and it looked even better. I really REALLY like this gold!
The second polish I have to show you is Blue Denim, a shimmery blue polish with a satin sheen finish that mimics denim.
Again, this is ONE coat. This is a highly pigmented polish that covers easily. It has the same flat, wide brush, which I found easy to use now I'm used to it!
I like this, but I'm not such a huge fan of blue so it's not as me as the gold one. It's quite similar to the Barry M Denim blue as well.
Look at it with topcoat though! Oooooh! So pretty!
Not content with just wearing these like this, I wanted to combine the two polishes together into one look. I used tape to make this simple design.
This shows how full the coverage is with the gold - this is painted over the blue, and is fully opaque.
I'm really very impressed with these polishes! The quality is excellent, the brush is nice, the bottle fits perfectly on my shelves with Nails Inc and Models Own bottles, and I like the Union Jack on the bottle.
You can buy these online from My Retail Beauty, where they cost £4.95 each. The site also has free shipping, and discounts if you spend over certain amounts. I probably wouldn't have considered buying these unless I'd seen them in a shop and was feeling the need to buy more nail varnish (although let's face it, I always want to buy more nail varnish!) but having tried them, I'm definitely a convert. There are some really nice colours in the range, especially in the textured glitters. The whole range is also 5-free, as it does not contain Dibutyl Phthalate, Toluene, Formaldehyde, Formaldehyde Resin and Camphor.
These polishes were provided for review. See my Disclaimer for more details.
My friend Lorraine tipped me off that Wilko's is currently stocking Essence polishes, so today I toddled off to check them out. I've seen Essence on blogs, but not tried any, as I'd never seen them in actual shops.
This is what I got! They were on 3-for-2, and they're all dirt cheap (£1.75 or £1.80, that sort of price). What I don't understand is WHY the bottles are all different shapes! That's already 4 different sorts of bottle, and possibly 5 if you look closely.
The first one I tried is the red one, Me and My Lover. This is a "sparkle sand effect" which I suppose is the equivalent of the Zoya Pixie Dusts, the Barry M Textured Glitters, and the OPI Liquid Sands. The brush is really nice - it's a flat handle and a wide, flat brush with a rounded end. It's not so wide that it's like a paddle (like some Sally Hansen brushes!) but was just the right size for my nails.
Me and My Lover is a glittery red textured polish. This is two coats.
I'm not thrilled with the texture to be honest. It's a pretty colour, and applies really evenly and easily with no pooling or need for cleanup. However, I think it's a bit ordinary as texture goes. It's not really textured enough in my opinion - if it wants to be textured it needs to be much more so, like the Zoyas or the OPIs. It's neither one thing or the other at the moment, I feel. It's a nice colour though.
Then I used the XXL shine gel-look topcoat to see what it looked like glossy. Nice! I like this a lot more with a glossy finish. It's much sparklier and brighter.
I've heard a lot about this topcoat, so I was pretty excited to try it. However, it was just an ordinary topcoat in my opinion. It was nice and glossy, but not more than many other topcoats. And I can't see much of a gel effect, it's just a glossy topcoat. And I have to say - these nails did take quite a long time to dry, and with only three coats, I think that's not great.
I'd say it's definitely worth checking out the Essence polishes in Wilko. They're cheap, and it's nice to see a different range to the usual high street polishes. But I'm not blown away by excellence. And I suppose at that price, it's fair enough.
Oh, I meant to add! My camera broke! I'm having to take photos on my phone for now til I can either get my very beloved camera fixed, or buy a new one.
I enjoyed wearing Zoya's Chyna yesterday, and it made me want to wear another of the Pixie Dust polishes. I couldn't choose between Solange (the gold one) and Dhara (the bright orange), so I did a gradient using both of them!
I love how this turned out!
The Pixie Dust polishes are quite hard to clean up if you get them on the skin round your nails, as you can see here. This isn't an issue usually, as they're really easy to control when you paint your nails normally, but sponging the gradient did make a lot of mess, that wouldn't all clean up.
I love how summery these look.
I added topcoat too, just to see what they looked like shiny....
Fabulous is clearly the answer to that!
I don't like my nail shape at the moment - several nails have broken short or been broken at the corners, so they're all really short, and several are rounded off. I wish they'd grow! I was looking back at old photos from last year, when they were really long and strong, and I don't know what happened! Oh well...
This week the British Nail Bloggers have started a new challenge, based on colours. This is a weekly theme - you can find more details here.
The first week's challenge is RED. I knew I wanted to do something that involved only using red polish, I didn't want to include other colours. I eventually settled on this, another version of the quilted design I tried previously (see here).
This uses Barry M Blood Orange as the glossy base - I used one coat. I then used striping tape to mark off a grid pattern, and added a coat of Zoya Chyna, the textured red glitter from the Pixie Dust collection.
I'm really pleased with how these came out!
I like the contrast between the glossy and the matte, and of the creme and the glitter. I should do quilted nails more often, they're easy to do and pretty effective.
Check out everyone else's red-themed nails here:
I was lucky enough to get Wimbledon Centre Court tickets in the draw this year, so yesterday my mother and I were watching tennis all day. We had two fabulous matches! And some really good fish and chips. I'm home now, so I've done Wimbledon nails to go with my mini tennis ball. I decided not to do grass or nets this year, and went with the Wimbledon colours of purple and green instead.
This is Models Own Pukka Purple, and Barry M Watermelon, done as a fifty/fifty using tape. I then added white striping tape.
I used my stupid broken short nail as an excuse to make a fuzzy tennis ball as an accent. This was Models Own Bikini with flocking powder dusted over before the polish dried.
I like these! Nothing too elaborate or complicated, but is clearly Wimbledon.
Today's nails are super girly and pretty! I was sent these lovely 3D roses from my favourite shop ever, the Born Pretty Store. I wanted to match them up with something really girly and delicate, so what better than the Barry M textured glitters, Lady and Princess?
I started with a base of Lady, the white textured glitter. I then used hole reinforcers to paint another coat of Princess, the pink textured glitter over the top. I glued the roses on using a tiny dab of topcoat.
I would have preferred more contrast between the white and the pink to make the half moons clearer; Princess came out looking paler over the white than it does on its own. However, they do match well with the delicate pink of the roses, so it does work nicely.
These roses are so pretty! I love them. They're very light, and stayed put really well with just topcoat. I didn't wear them for a full day though, and if I was going to, I would use nail glue rather than topcoat. I'm not sure what the roses are made of - it's not plastic, it's more like fimo or something like that. They're lovely and light, and not scratchy or clunky on my hands.
These roses are item #6530 at the Born Pretty Store. There are 18 different colours available, and they cost $2.09 for 10 flowers. You can also use my discount code for an extra 10% off all orders.
These roses were provided for review purposes, but opinions are 100% honest. See my Disclaimer for further details.
This week's Friday Challenge is... Sweet Shop!
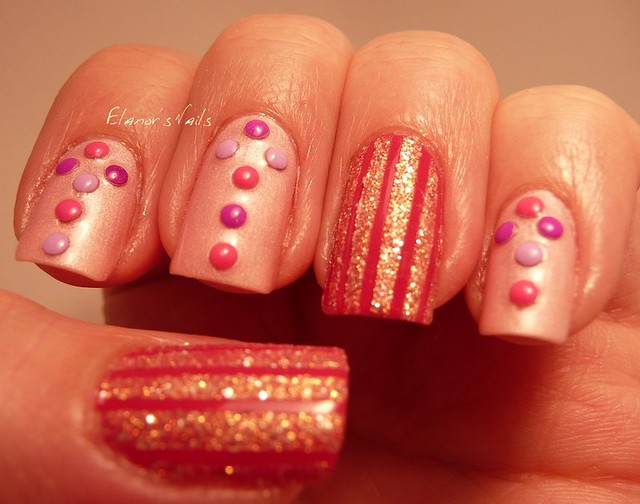
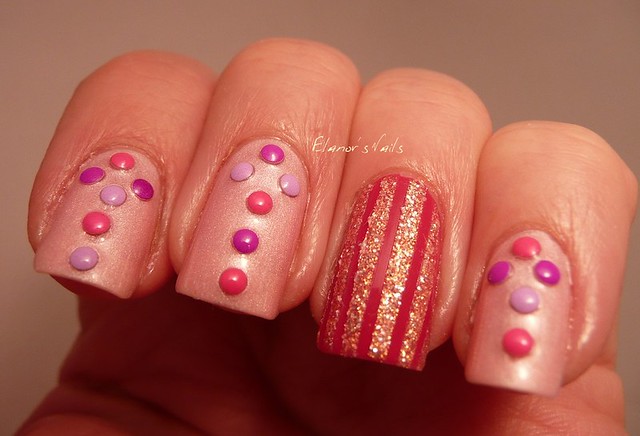
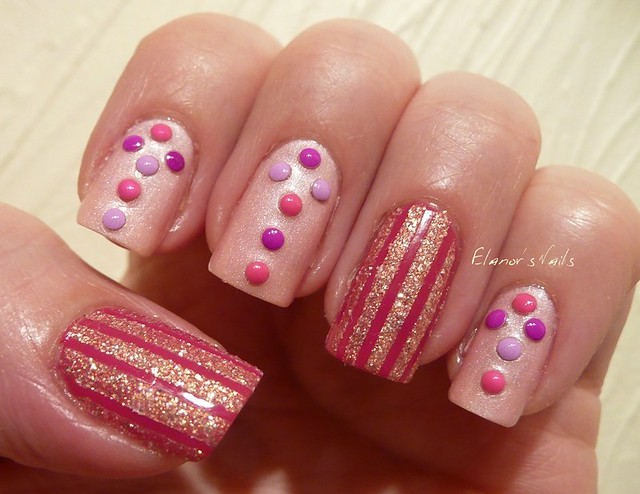
I wanted to go for a sweets-inspired look, rather than actually painting sweets themselves onto my nails.
For this design I used two coats of Barry M Blossom from the Silks collection (my bottle is down to 2/3 full! I'm going to need a back-up!) on three fingers, and two coats of Jacava Raspberry Bavarois on my thumb and ring fingers.
I then added studs to the Blossom fingers. The studs are from the Born Pretty Store, and are stuck down with topcoat. I used striping tape to tape off stripes on my Raspberry Bavarois fingers and then added a coat of Barry M Princess, the textured pinky gold glitter, for a sugary texture.
I'm quite pleased with this look. It's pretty and sweet, and I think it meets the brief! I was really pleased with how well the studs stayed put too - they've been on for 24 hours now and have survived intact, which doesn't always happen with studs and topcoat for me.
I still can't get enough of the Barry M Silks! They're such nice polishes, especially Blossom, the pink one. I also loved yesterday's quilted nails and wanted to do more, so I combined Blossom with another new (to me) Barry M, Princess, from the textured glitter range.
So this is three coats of Blossom, with Princess on the accent nails, applied over a grid of striping tape to give the quilted effect (see more here.)
Princess is a lovely glitter - it's a really pretty pastel pink glitter in a pink base, with a gold edge to it as well. It dries to a sparkly, glittery, textured finish, which I really like.
I think this works really well with the quilted look. I'm definitely not bored of the quilted pattern yet!
So it's Thursday night again and it's time to do my Friday Challenge nails!
This week, with the Olympics opening ceremony tomorrow, my theme is... WINTER OLYMPICS.
This is two coats of Barry M Lady, which is a lovely white textured glitter. I love this polish for a snow effect; the texture works really well I think. As all the pre-Olympics talk has been about Russia's attitude to gay rights (or lack of them), I went with the rainbow design, which I did with striping tape. I did a quick Olympics rings design on the thumb with a Barry M nail art pen. I don't like my rings, as they didn't link properly; I think I made them too small.
I have decided that I don't like striping tape left on the nails - it's almost impossible to get it to lie totally flat at the sides, and I know I'll end up picking this off.
I don't really watch much of the winter olympics, I have to say. I like figure skating, especially the men's competition (but don't like ice dancing) and I used to enjoy skiing, although I haven't watched it in years. I quite enjoy watching the ski cross and the acrobatic skiing too.
As for the nails, I like the white, I like the look of the rainbow (although not the feel) and I don't like the thumb.